
Getting Started with Ceramics: A Practical Beginner's Guide
A grounded guide to starting ceramics: which clay body to buy first, what bisque and glaze firing actually do, what a beginner setup costs, why pieces crack, and how to keep clay dust out of your lungs.
Rewritten with AI; reviewed by Najam Kausar on . How we work.
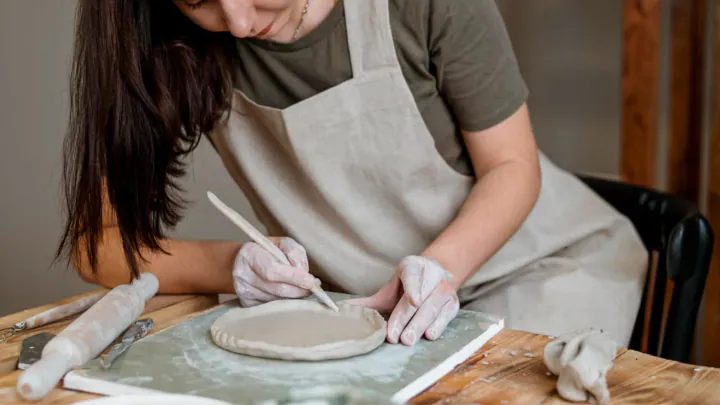
TL;DR: Start with a bag of mid-fire stoneware, five basic tools, and hand-building. Join a community studio for kiln access instead of buying one. Dry work slowly, wedge out air, and expect your first dozen pieces to be practice. Usable mugs come faster than you think — perfect ones don't.
What is ceramics, and how is it different from pottery?
Ceramics is the craft of shaping objects from clay and permanently hardening them with heat, so that the clay body undergoes an irreversible chemical change and can no longer be dissolved in water. Pottery is the subset of ceramics concerned with vessels — mugs, bowls, jars, plates. Sculpture, tile, and architectural work are ceramics too.
That distinction matters practically, not just semantically. The moment heat enters the equation, you are dealing with kiln access, firing temperatures, glaze chemistry, and food safety. If you skip firing entirely and use air-dry clay, you are making a clay object, not a ceramic one — and it will never hold water.
What do you actually need to buy to start?
A usable starter kit is five tools and a bag of clay, not the 40-piece sets sold online. Buy this and nothing else for your first month:
- Clay — one 25 lb bag of mid-fire stoneware with grog. That is roughly 15–20 small mugs' worth.
- A needle tool — for scoring joins, trimming rims, and testing wall thickness.
- A wooden or rubber rib — for smoothing, compressing, and shaping curves.
- A wire cutter — for slicing clay off the block and off a wheel head.
- A sponge and a water container — moisture control is most of the job.
Add a serrated scoring tool, a loop trimming tool, and a canvas board when you know you'll keep going. Glazes are a studio purchase, not a beginner purchase — most community studios supply them, and buying your own before you understand firing temperature is the fastest way to waste $80.
Which clay should a beginner choose?
Choose a mid-fire stoneware. It is durable, tolerant of clumsy handling, and vitrifies to a non-porous body that is genuinely usable for food and drink. Earthenware is softer and fires lower but stays porous unless fully glazed; porcelain is exquisite and will punish every mistake you make.
| Clay body | Typical firing range | Strengths | Drawbacks | Good first choice? |
|---|---|---|---|---|
| Earthenware | About cone 06–04 (roughly 1,830–1,940 °F) | Soft, plastic, bright glaze colors, low energy use | Porous when unglazed, chips easily | Acceptable |
| Stoneware (mid-fire) | About cone 5–6 (roughly 2,165–2,230 °F) | Strong, vitrified, forgiving, widely stocked | Heavier feel than porcelain | Yes — start here |
| Porcelain | About cone 6–10 | Translucent, smooth, prized surface | Slumps, warps, cracks; punishing for beginners | Not yet |
| Air-dry clay | No firing — never put in a kiln | Zero equipment, kitchen-table friendly | Not waterproof, not food safe, fragile | Decorative practice only |
| Polymer clay | Home oven, about 265–275 °F | Cheap, colorful, repeatable | A plastic, not a ceramic material at all | Different craft |
One detail almost no beginner guide mentions: grog. Grog is pre-fired clay ground into a sandy additive, and a clay body containing it dries more evenly and cracks far less. It feels rougher on the hands, which is why smooth clays get recommended — and why beginners using smooth clay end up with split handles and cracked bases.
Do you need a kiln, and what happens during firing?
You need kiln access, not kiln ownership. Firing happens in two passes. Bisque firing takes bone-dry greenware to roughly cone 06, burning out organic matter and converting the clay into a hard, still-porous state that absorbs glaze evenly. Glaze firing then takes the glazed piece to the clay body's maturing temperature, where the glaze melts into glass and the clay vitrifies.
Three realistic routes to a kiln: join a community studio with firing included in membership; pay a local studio or clay supplier a per-piece or per-shelf firing fee; or buy your own. A small home kiln typically needs a dedicated 240V circuit, clearance from combustible walls, and ventilation — which means an electrician, and in many rentals, a landlord's refusal. This does not apply if you live somewhere with no safe installation option; in that case, use a studio and enjoy not having to fix kiln elements.
How much does starting ceramics cost?
Budget roughly $50–$100 for tools and clay if you already have firing access, or a few hundred dollars for a multi-week beginner class that bundles clay, glaze, firing, and studio time. A full home setup is a four-figure commitment before you make anything.
| Route | Typical up-front cost | Ongoing | Best for |
|---|---|---|---|
| Beginner class (6–8 weeks) | A few hundred dollars, materials usually included | Ends with the term | Finding out if you like it, with a teacher watching your hands |
| Community studio membership | Low up-front; monthly fee plus clay by the bag | Monthly membership, clay, sometimes firing fees | Anyone continuing past the first class |
| Home studio (wheel + kiln) | Thousands, plus electrical work | Electricity, clay, glaze, kiln element replacement | Potters already working weekly who know their firing schedule |
The honest decision rule: do not buy a wheel or kiln until you have completed at least 20 studio sessions. Marketplace listings are full of barely-used wheels from people who bought equipment before they bought experience. None of this is financial advice — it's just how craft spending tends to behave.
Should you learn hand-building or wheel throwing first?
Hand-build first. Pinch pots, coils, and slabs teach you how clay behaves at every moisture stage — soft, leather-hard, bone-dry — without the separate athletic problem of centering on a spinning wheel. You will finish a real object in your first session, which matters more for motivation than most people admit.
The four techniques worth knowing
- Pinch — one ball of clay, two thumbs. The fastest route to a first cup.
- Coil — rolled ropes stacked and blended. Scales to large, asymmetric forms.
- Slab — rolled sheets cut and joined. Ideal for boxes, trays, and tiles.
- Wheel throwing — centrifugal shaping. Precise and repeatable, and typically several weeks of practice before you produce something you'd glaze.
Slip casting — pouring liquid clay into plaster molds — is a production technique, not a beginner one. It rewards mold-making skill rather than hand skill, and it's a detour at this stage.
First sessions on the wheel
Expect your first genuinely usable cylinder somewhere around hour five to ten of wheel practice. Two rules help most:
- Center with your body, not your arms. Lock your elbows against your thighs and lean. Arm muscles shake; braced bones do not.
- Keep the clay wet but not soupy. Over-watering saturates the walls and causes collapse. Sponge excess water out of the bottom of every form.
A worked example: plan for shrinkage
Clay shrinks as water leaves it and again as it vitrifies — usually about 10–14% total for stoneware. If you want a finished mug 4 inches tall that holds 12 oz, build it around 4.5 inches tall and slightly wider than the target. This is the single most common surprise for beginners making a lid, a plant pot for a specific shelf, or a dish that has to fit a drawer. Your clay supplier publishes the shrinkage rate for each body; write it on the bag.
Why do beginners' pieces crack or explode in the kiln?
Almost always moisture, not air bubbles. Trapped water flashes to steam above 212 °F and blows the piece apart from the inside; thick, uneven walls hold that water longest. "Air bubbles cause explosions" is the most repeated bit of pottery folklore, and it's mostly wrong — wedging matters because it makes the clay homogeneous and workable, and because an enclosed void can expand, but the real culprit is a piece that was fired damp.
- Dry slowly and evenly. Loosely tent work in plastic for the first day or two so rims don't outrun the base. Handles and attachments crack for exactly this reason.
- Compress your bases. On the wheel, an uncompressed floor produces the classic S-crack across the bottom, often appearing only after the bisque.
- Join at leather-hard, both sides scored and slipped. Joining wet to dry is a guaranteed split.
- Keep glaze off the foot. Glaze that reaches the kiln shelf fuses the piece to it permanently — and studios charge for damaged shelves.
- Glaze at the recommended thickness. Too thick runs and crawls; too thin looks chalky and may not be food safe.
To score and slip, scratch a crosshatch into both mating surfaces, brush on slip (clay thinned with water to yogurt consistency), press together, and blend. A wet handle stuck onto a leather-hard mug is the most common reason handles pop off during drying.
Before firing, hold the piece against your cheek. If it feels cool rather than room temperature, water is still evaporating and it needs more time. Never speed drying with a heater, a sunny window or a fan.
How do you decorate a piece?
Decorate at leather-hard for texture and carving, and after bisque firing for glaze. Bone-dry clay crumbles and releases silica dust when carved, so work leather-hard and wear a properly fitted respirator if you sand.
- Texture: press leaves, lace, rope, or carved stamps into leather-hard clay.
- Underglazes: they behave like paint and keep their color through firing.
- Carving: a loop tool or a sharpened wooden skewer at leather-hard.
- Air-dry pieces: acrylic paint plus a water-based sealer, for decorative use only.
Is clay dust dangerous, and how do you set up a safe home space?
Dry clay and glaze dust contain crystalline silica, a recognized respiratory hazard when inhaled repeatedly over time. The fix is simple and non-negotiable: never clean dry. Wipe every surface with a damp sponge, mop rather than sweep, skip household vacuums unless they are HEPA-rated, and wear a properly fitted respirator when handling dry materials. If you have asthma or any existing lung condition, talk to a qualified medical professional before setting up at home.
Beyond that, a workable home corner needs very little: a wipeable table, airtight bins for clay, a covered bucket for reclaim, plastic sheeting, a drying shelf out of direct sun and away from heating vents, and access to a sink with a clay trap — clay settles and will eventually block your plumbing. Give finished work somewhere deliberate to live.
Can you make food-safe pieces at home?
Yes, if three things line up: a vitrified clay body fired to its maturing temperature, a commercial glaze labeled food safe and lead free, and a fully fused, non-crazed glaze surface. Miss any one and the piece is decorative. Crazing — the fine web of cracks in a glaze — harbors bacteria and makes a mug unsuitable for daily drinking, however good it looks.
Two practical rules: fire to the cone your clay and glaze both specify, and don't mix a low-fire glaze onto a mid-fire body and hope. If you sell or gift work, say plainly whether a piece is functional or decorative.
Layering glazes can cause crazing and leaching even when each glaze alone is food safe, so try combinations on a test tile first. If you plan to sell tableware, check your local requirements for ceramics that contact food.
Why does working with clay feel so calming?
Because it demands your hands and your attention at the same time, at a pace you cannot rush. Clay gives immediate physical feedback, has no notifications, and punishes multitasking — which is roughly a definition of focused attention. Research on repetitive handcraft generally suggests benefits for stress and mood, though it is a hobby rather than a treatment; anyone managing a diagnosed mental health condition should work with a qualified professional.
If the appeal is the offline part, pair it with a wider reset — our guide to a digital declutter that reclaims focus and time covers the same territory from the other direction, and a calm, structured morning routine makes a weekly studio session much easier to protect.
How long until you make something you'd actually keep?
With hand-building, often the first session. With the wheel, plan on several weeks of regular practice before a piece survives centering, pulling, trimming, drying, bisque, and glaze without a flaw. Count on losing a meaningful share of early work — that is normal attrition, not failure, and every studio potter still loses pieces.
Set a low, concrete target: six finished pieces in your first three months. Make the same form repeatedly rather than a different one each week, because repetition is what builds the muscle memory. Keep your first ugly mug. In a year it will be the clearest evidence you have that you improved.
Small, low, open forms dry evenly and forgive mistakes, so they make good early projects:
- A ring dish or key tray.
- A small planter with a drainage hole, punched while leather-hard.
- Chunky candle holders, which reward thick walls rather than punishing them.
- A spoon rest or soap dish: a slab and two pinched edges.
From wet clay to a finished glazed mug, three to four weeks is normal in a shared studio. Photograph every piece; months of progress photos show improvement your memory will not credit.
Key takeaways
- Start with grogged mid-fire stoneware, five tools, and hand-building — not a wheel, not porcelain, not a kiln.
- Rent kiln access through a class or community studio; only buy equipment after roughly 20 sessions.
- Most kiln failures are damp or unevenly dried work, not air bubbles — dry slowly, compress bases, join at leather-hard.
- Build about 10–14% oversized to allow for shrinkage, especially for lids and pieces that must fit a space.
- Clean wet, never dry: silica dust is the one real health risk in this craft, and it is fully manageable.
- Food safe means vitrified body plus a properly fired, lead-free, non-crazed glaze — all three, every time.
Frequently asked questions
Do I need a kiln to start ceramics?
No, but you need access to one if you want durable, waterproof, food-safe pieces. Most beginners start at a community studio or pay a local studio per-piece firing fee instead of buying a kiln. Air-dry clay works for decorative objects only — it stays porous, softens in water, and should never be put in a kiln.
What is the best clay for a complete beginner?
A mid-fire stoneware with some grog (sand-like texture) is the best all-around starting point. It is forgiving to handle, resists cracking while drying, and fires to a strong, non-porous body at around cone 5–6. Porcelain is beautiful but unforgiving, and it is the wrong place to learn.
Why did my pot explode in the kiln?
Almost always because it was not fully dry. Trapped moisture turns to steam during firing and blows the piece apart, and thick or uneven walls make it worse. Let work dry to room temperature and bone-dry — a week or more for thick pieces — and wedge your clay to remove large air pockets.
How much does it cost to start ceramics?
Expect roughly $50–$100 for a hand-building kit with clay and basic tools if you already have firing access, or a few hundred dollars for a multi-week community class that usually includes clay, glazes, firing, and studio time. A full home studio with a wheel and kiln runs into the thousands, including electrical work.
Should I learn hand-building or wheel throwing first?
Hand-building first. Pinch, coil, and slab work teach you how clay behaves at every moisture stage without the added difficulty of centering, and you can make finished, usable objects in your first session. The wheel typically takes several weeks of regular practice before you produce something worth glazing.
Is pottery clay dust dangerous?
Dry clay and glaze dust contain crystalline silica, which is a genuine respiratory hazard when inhaled repeatedly. Never sweep or sand dry — wipe surfaces with a damp sponge, mop rather than vacuum unless you have a HEPA vacuum, and wear a properly fitted respirator when mixing dry materials. If you have any existing respiratory condition, consult a qualified medical professional first.
How much does clay shrink when fired?
Most stoneware shrinks roughly 10–14% from wet to fired, combining drying and firing shrinkage. A mug thrown 4.5 inches tall may finish near 4 inches. If you are making something that must fit a specific space or lid, build it oversized and check your clay supplier's stated shrinkage rate.