Master the Lens: Photography Tips and Camera Tricks That Work
Better photos come from light, distance and timing long before they come from gear. Here are the photography tips and camera tricks that actually change your results, including starting settings for common scenes and the errors that quietly ruin frames.
Rewritten with AI and republished automatically. Our editors set the standards and fix reported errors — how we work.
TL;DR: Better photographs come from light, position and timing, not from spending more. Learn one composition default, one focus habit and a starting exposure for each common scene, then edit lightly. Everything below is arranged so you can apply it on your next walk with whatever camera you already own.
Photography is the practice of recording light with a camera to communicate a moment, a place or a person. That definition matters because it puts light first and hardware last — and it explains why two people standing in the same spot with the same phone come home with very different pictures.
What is the fastest way to improve my photos without buying new gear?
Change your distance and your angle before you change anything else. Most disappointing photos fail because the photographer stood at eye level, five feet too far away, with the light behind the subject. Take three steps closer, crouch, and put the light source to the side.
A useful working rule: shoot the obvious frame first so you have it, then deliberately shoot three variations — closer, lower, and from the opposite side. The keeper is almost never the first frame. This one habit outperforms a lens upgrade for most people in their first year.
How do I use natural light when golden hour is not an option?
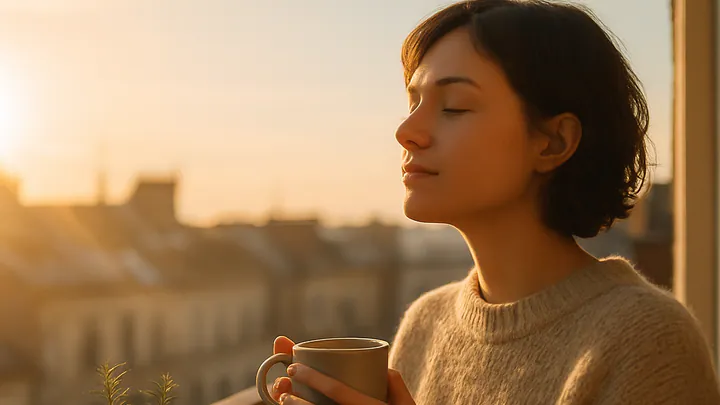
Golden hour — the hour after sunrise and before sunset — gives warm, low, directional light that flatters nearly everything. When you cannot shoot then, find open shade: the shadowed side of a building, a doorway, or under a tree canopy with sky visible. Open shade gives soft, even light with no harsh nose shadows.
Overcast days are not a compromise; they are a giant softbox, ideal for portraits, flowers and street detail, though skies go flat and are best cropped out. Midday sun is the genuinely difficult case: contrast is extreme and faces squint. Use it for graphic shadows and architecture rather than people.
Window light indoors is the most underrated light there is. Place your subject about a foot back from a north-facing window, turn their face toward it, and you have professional-looking portrait lighting for free. If you want to build a reliable habit around early light, our guide to the 10-minute morning sunlight habit pairs neatly with shooting at sunrise.
Which composition rules actually matter, and when should I break them?
Three carry most of the weight: the rule of thirds, leading lines and framing. Place your subject or the horizon along the lines of a 3x3 grid rather than the middle. Use roads, fences, shorelines or railings to pull the eye toward the subject. Shoot through arches, windows and branches to add depth.
Break the rule of thirds deliberately when the subject is symmetrical — a reflection, a doorway, a face looking straight down the lens. Centered symmetry reads as formal and calm; thirds read as dynamic. Choose one on purpose.
The mistake nobody warns beginners about is background neglect. Before you press the shutter, look at the edges and the space behind the head. A pole growing out of someone's skull ruins an otherwise good portrait, and no editing app removes it cleanly.
What camera settings should I start from in common situations?
Start from a known setting and adjust, rather than guessing from scratch. The table below gives sane starting points; check your first frame, then correct exposure and reshoot.
| Scene | Aperture | Shutter | ISO | Why |
|---|---|---|---|---|
| Outdoor portrait, shade | f/2 – f/2.8 | 1/250s | 100–400 | Separates subject from background |
| Bright daylight landscape | f/8 – f/11 | 1/250s | 100 | Front-to-back sharpness |
| Indoor, window light | f/1.8 – f/2.8 | 1/125s | 400–1600 | Indoor light is darker than it looks |
| Kids, pets, sports | f/4 | 1/500s+ | Auto, capped | Freezing motion beats everything else |
| Night, tripod | f/8 | 2–30s | 100 | Long exposure keeps files clean |
Two rules worth memorizing. The reciprocal rule: to avoid camera shake, keep your shutter at least 1 over your focal length — 1/50s on a 50mm lens, 1/200s on a 200mm. The sunny 16 rule: in bright direct sun, f/16 with shutter speed set to roughly 1 over your ISO gives correct exposure, which is a useful sanity check when your meter is confused by snow or backlight.
A worked example
Indoor portrait, late afternoon, subject beside a window. Set a 50mm lens to f/2, shutter 1/125s (fast enough for the reciprocal rule and small head movements), ISO 400. Take one frame. Highlights on the cheek blown out? Drop to ISO 200. Too dark? Push ISO to 800 rather than slowing the shutter — noise is fixable in editing, motion blur is not.
How do I get sharp focus every single time?
Focus on the eye nearest the camera for any portrait, and use single-point autofocus rather than letting the camera choose. Half-press the shutter to lock focus, recompose slightly, then press fully. On a phone, tap the subject to lock focus and exposure, then drag the brightness slider.
Depth of field is your creative control. Wide apertures (f/1.8–f/2.8) blur backgrounds but leave a paper-thin zone of sharpness — at f/1.8 on a portrait, eyelashes can be sharp while the ear is not. Narrow apertures (f/8–f/11) keep landscapes crisp from foreground to horizon.
This does not apply if you are shooting computational portrait mode on a phone. That blur is software estimating depth, and it consistently struggles with hair, glasses frames, and gaps between arm and body. For a subject with curly hair or a pet, switch portrait mode off and step back — a clean, sharp frame beats a smeared fake one.
Do I need a better camera, or a better lens?
A lens changes your pictures more than a body does. If you already own an interchangeable-lens camera with a kit zoom, a 50mm f/1.8 prime is the highest-value purchase in photography: it gathers far more light, produces genuine background separation, and forces you to move instead of zoom.
| Setup | Best for | Real limitation |
|---|---|---|
| Modern smartphone | Daylight, travel, candids, video | Low light, long reach, fake background blur |
| Camera + kit zoom | Flexible framing, learning settings | Slow aperture; struggles indoors |
| Camera + 50mm f/1.8 | Portraits, indoor light, low light | Fixed focal length; you walk |
| Tripod (any camera) | Landscapes, night, long exposure | Bulk; slows you down |
What are the most costly beginner mistakes?
- Blowing the highlights. Once a sky or a white shirt is pure white with no data, no slider brings it back. Shadows are recoverable; highlights largely are not. When in doubt, expose slightly darker and lift later.
- Chimping instead of shooting. Reviewing every frame on the back screen means missing the next moment. Check once, adjust, then keep shooting.
- No backup. A single memory card holding a once-only event is a real risk. Copy to two places, one of them off-site, as soon as you get home.
- Zooming with your phone. Digital zoom throws away detail. Walk closer or crop later from the full-resolution file.
- Hoarding every frame. Ten thousand unsorted images is a burden, not an archive. Delete ruthlessly on import; the approach in our digital declutter guide works just as well on a photo library as on an inbox.
How should I edit photos without ruining them?
Edit in this order: exposure, white balance, crop, then contrast and color, and sharpen last. Working in that sequence stops you from correcting the same problem twice. Lightroom, Darktable, Snapseed and your phone's built-in editor are all capable of everything in that list.
Shoot RAW if you intend to edit at all. RAW files keep far more tonal information than JPEGs, which means real highlight recovery and free white-balance correction after the fact. The trade-off is bigger files and a mandatory editing step.
Restraint is the skill. Watch for three tell-tale signs of over-editing: orange skin tones, bright halos along rooflines and horizons, and skies so saturated the blue turns to a flat block. If you can see the edit before you see the picture, pull the sliders back.
How do I shoot candids and portraits that feel natural?
Talk to your subject and shoot while they are responding, not while they are posing. The frame taken half a second after someone finishes laughing is nearly always better than the one where they are holding a smile. Burst mode exists for exactly this window.
For candids in public, be unhurried and obvious rather than sneaky; people relax around a photographer who is clearly not hiding. Pre-set your exposure and focus distance so you are not fumbling when something happens. Respect the room — ask when a photo would be intrusive, and accept no.
Wardrobe matters more than beginners expect. Solid colors and simple textures keep attention on the face, while busy logos and tight patterns fight the subject and can shimmer in fine detail.
What creative exercises break a photography rut?
Constraints produce better work than freedom. Give yourself one lens, one hour and one block of your neighborhood, and you will come back with more usable frames than an unstructured afternoon anywhere.
- One color, one day. Photograph only red things. You will start seeing structure everywhere.
- Light painting. Tripod, 15–30 second exposure in near darkness, a flashlight traced through the frame.
- Puddle reflections. Put the lens two inches from the water surface and shoot the mirrored version of the street.
- Ground level only. An entire shoot with the camera below knee height changes every familiar subject.
- Same subject, thirty frames. One tree, one hour, thirty genuinely different photographs. This is the most uncomfortable and most effective drill on the list.
Key takeaways
- Light and position decide the photo; settings only record the decision you already made.
- Memorize two starting rules — shutter at 1 over focal length, and f/8–f/11 for landscapes, f/2 for portraits.
- Protect your highlights, focus on the near eye, and check the background before you press the shutter.
- A 50mm f/1.8 lens improves results more than a new camera body for most photographers.
- Edit in a fixed order and stop before anyone can see the edit.
- Back up to two locations on import, and delete the misses while you still remember why they missed.
Frequently asked questions
What is the single fastest way to improve my photos?
Move your feet and watch the light. Changing your position relative to the subject and the light source improves more photos than any setting, filter or lens upgrade. Most weak images are weak because the photographer stood in the wrong place at the wrong hour.
Do I need an expensive camera to take good photos?
No. A modern smartphone handles most everyday scenes well, and a used mirrorless or DSLR body with a 50mm f/1.8 lens covers almost everything else. Gear expands what is possible in low light and at distance; it does not create composition, timing or expression.
What is the rule of thirds, and should I always follow it?
The rule of thirds places key elements along the lines of a 3x3 grid rather than dead center, which usually produces a more dynamic frame. It is a default, not a law. Symmetrical subjects, reflections and formal portraits often look stronger centered.
Should I shoot RAW or JPEG?
Shoot RAW if you plan to edit, because RAW files retain far more highlight and shadow information and let you correct white balance after the fact. JPEG is fine when you want to share immediately and your exposure is already close. Many cameras and phones can record both at once.
What shutter speed stops camera shake?
As a starting point, use a shutter speed at least as fast as 1 over your focal length, so 1/50s or faster on a 50mm lens. Image stabilization buys a few stops, but moving subjects need speed regardless: around 1/250s for walking people and 1/500s or faster for sports and kids at play.
How much editing is too much?
If a viewer notices the editing before the subject, it is too much. Keep skin tones plausible, avoid halos along high-contrast edges from heavy clarity or sharpening sliders, and never push saturation so far that reds and skies lose detail. Edit, then step away and re-check the next day.
Why do my indoor photos look blurry or noisy?
Indoor light is usually several stops darker than it appears, so your camera either slows the shutter until movement blurs or raises ISO until noise appears. Move closer to a window, open the aperture wider, brace the camera against something solid, and raise ISO deliberately rather than letting auto mode decide.