
Fixing Streaky Self-Tanner, Orange Palms and Dark Ankles
Most self-tan mistakes can be corrected in a day without scrubbing off the whole tan. Match each problem to its cause, fix it fast, and set up your next application so it goes right.
Drafted with AI and published automatically. Our editors set the standards and fix reported errors — how we work.
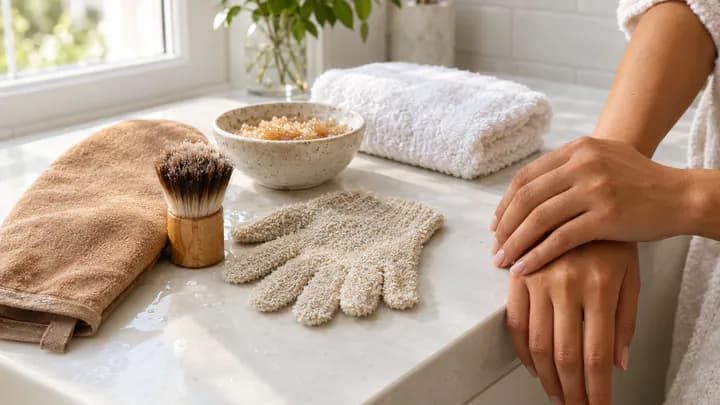
A streaky or patchy self-tan can almost always be corrected in a day without stripping the whole thing off: the fix is to remove color only where there is too much, add a little where there is too little, and leave the rest alone. This guide is for anyone who has just woken up to stripes on their shins, dark knees or orange palms with an event coming up. It matches each problem to its likely cause, gives a targeted fix, and then covers what to change so the next application goes right.
It helps to know how the color works. Most self-tanners use dihydroxyacetone (DHA), a sugar-derived ingredient that reacts with proteins in the dead outer layer of skin and browns it over several hours. The color sits only in that surface layer, which is why it fades unevenly as skin sheds, usually over about a week, and why gentle exfoliation is the main tool for every fix below. Anywhere the outer layer is thicker or drier, such as knees, elbows, ankles and knuckles, it grabs more DHA and goes darker.
Diagnose the problem before you scrub
First, rinse off the guide color. Many tanners contain a wash-off bronzer so you can see where you applied; it can look streaky on its own and disappears in the first shower. Judge the result only after a lukewarm rinse once the full development time on the label has passed.
| What you see | Likely cause | Fix |
|---|---|---|
| Stripes or lines, often on shins, forearms or the back | Product applied in straight strokes, not blended, or uneven amounts | Targeted exfoliation along the dark lines; blend light gaps |
| Dark knees, elbows, ankles, heels or knuckles | Dry, thick skin absorbing extra DHA; leftover product pooling in creases | Warm soak, then gentle buffing; tan remover on the worst spots |
| Orange or brown palms, stained nails, dark lines between fingers | Hands not washed or protected right after applying | Soap, warm water and a scrub; tan remover; nail polish remover on nails only |
| Pale gaps, missed patches, white tide marks at the ankles | Areas skipped or wiped off by clothing or sweat | Blend a small amount of extra tanner into the gap |
| Whole tan looks orange | Shade too dark, too much product, or layered applications | Overall exfoliation in a warm bath; lighter shade next time |
| Tiny dark dots on legs | Shaving or waxing just before applying; product settling in open follicles | Light exfoliation over a day or two; shave earlier next time |
Fading streaks and lines with targeted exfoliation
The goal with a streak is to soften the dark edge so it blends into the color around it, not to erase the tan. Work only on the line itself.
- Soften the skin. Spend 10 to 15 minutes in a warm shower or bath. Warm water loosens the outer layer where the color sits, so it comes away with less rubbing.
- Buff the dark line. Use a damp exfoliating mitt in small circles along the streak, with light pressure, for 20 to 30 seconds at a time. Check in good light between passes; it is easy to overshoot and create a pale stripe instead.
- Use a tan remover for stubborn lines. If buffing alone is not enough, apply a self-tan remover (these typically use exfoliating acids or urea) just to the streak, leave it for the time on the label, then rinse while buffing with the mitt.
- Blend the edge. If the line is lighter but still visible, a tiny amount of tanner worked across the boundary with a mitt in circular motions will even out the transition as it develops.
Expect each session to lift some color, not all of it. Two gentle rounds a few hours apart are kinder to skin than one hard scrub, which can leave it red and sore and make the remaining color look blotchier. Stop if the skin stings or looks raw.
Lightening dark knees, elbows, ankles and knuckles
These joints go dark for two reasons: the skin is thicker and drier, so it takes up more DHA, and product collects in the folds when you bend. The fix is the same warm-water-then-buff approach, aimed at the creases.
Soak first, then work the exfoliating mitt or a soft body scrub in circles over the knee or elbow while it is bent, so the creases open up. A tan remover left on for its labeled time helps here more than anywhere else, because the color is concentrated. On ankles, pay attention to the ring around the ankle bone and the top of the heel, where product often pools after you stand up.
After exfoliating, moisturize the area. Hydrated skin reflects light more evenly, which makes any remaining dark patch less obvious for the evening ahead. If your knees or elbows were naturally darker than the rest of your skin before you ever tanned, that part will not scrub off, so the realistic aim is simply not to add extra tan on top next time.
Removing stains from palms and between fingers
Speed matters more than technique with hands. If you have just applied tanner and your palms are coloring up, wash them right away with soap and warm water and scrub the palms, the sides of the fingers and the webbing between them with a nail brush or a sugar scrub. Each hour of delay lets more color develop.
If the stain has already set overnight:
- Soak and scrub. Wash dishes by hand or soak your hands in warm soapy water for about 10 minutes, then scrub palms and finger creases. Palms shed quickly, so repeated washing through the day fades them noticeably.
- Tan remover on the palms. Apply it to the palms and between the fingers, leave it for the labeled time, and rinse while scrubbing. Keep it off the backs of your hands if those look right.
- Nails and cuticles. Tanner can tint the nail plate and stain the cuticles. Nail polish remover on a cotton pad, used on the nails only, can lift surface staining; keep it off the surrounding skin, and moisturize the cuticles afterward. A coat of nail polish hides the rest.
The backs of the hands should stay tanned so they match your wrists. If the color stops in a line at the wrist, buff that line with a damp mitt as you would a streak.
Filling pale gaps and missed spots
For a missed patch, add color rather than removing it elsewhere. Put a pea-sized amount of tanner on a mitt or a damp kabuki brush, apply it to the center of the gap, and feather outward with light circles so there is no hard edge. Use less than you think; you can repeat once the first layer develops, but you cannot easily take it back. A gradual tanning lotion is more forgiving for this than a dark mousse.
If the event is tonight and there is no time for tanner to develop, a wash-off body bronzer blended over the gap will cover it for the evening.
When the whole tan looks orange
An all-over orange cast usually means the shade was too dark for your skin, too much product went on, or you layered a second coat too soon. It is rarely something you can fix in one spot because it is everywhere.
The quickest correction is a long warm bath, 15 to 20 minutes, followed by gentle all-over exfoliation with a mitt, then moisturizer. That typically takes the depth down a step without leaving patches. If it is still too strong, an all-over tan remover is the faster route, though at that point you are close to starting again. The other option is to wait: because the color sits in skin that is shedding anyway, it softens on its own over the next few days.
For next time, choose a lighter shade or a gradual formula, use less product per section, and give one coat its full development time before deciding whether you want a second. Tanners with a green or violet-toned guide color are formulated to read less orange, which some people with fair or cool-toned skin prefer.
How to get it right next time
Most of the problems above start before the tanner touches your skin. These changes prevent them:
- Exfoliate 24 hours before, not right before. Exfoliating the day ahead removes old dead skin and patchy leftover tan while giving freshly scrubbed skin time to settle. Do any shaving or waxing at the same time, so follicles have closed and do not trap product as dark dots.
- Moisturize the dry spots as a barrier. Just before applying, put a thin layer of light, non-greasy lotion on knees, elbows, ankles, heels, knuckles and the sides of the feet. It slows how much tanner those areas take up, so they come out closer to the rest of your skin. Leave the rest of the body bare so it tans evenly.
- Apply with a mitt in sections. A tanning mitt spreads product thinly and keeps it off your palms. Work one area at a time (one lower leg, one thigh, one arm) in circular strokes rather than straight lines, which is what causes stripes.
- Use a damp kabuki brush for hands and feet. Do not apply fresh product here. Instead, take what is left on the mitt, or dip a slightly damp kabuki brush into that residue, and sweep it over the backs of the hands, the knuckles with the fist clenched, and the tops of the feet. Flex the wrist and ankle while you do it so the creases are covered lightly, not loaded.
- Clean up immediately. Wash your palms with soap and a scrub as soon as you finish, then wipe the nails, the skin between the fingers and the soles of the feet with a damp cloth.
- Protect the development time. Until the time on the label has passed, avoid exercise, hot rooms and anything that makes you sweat, keep away from water (including washing hands, if you can), and wear loose, dark clothing. Tight waistbands, bra straps, socks and leggings rub tanner off and leave pale lines. Many people apply in the evening and sleep in loose pajamas.
If you are trying a new formula, test it on a small patch, such as the inner forearm, a day ahead to check the shade and whether it irritates your skin. A rash, itching or swelling that does not settle after you wash it off is worth showing to a doctor or pharmacist.
When home tanning is not the right choice
Every fix here takes some effort and a bit of trial and error. If you want an even result for a wedding or photo shoot with no risk of streaks and no time to correct them, book a professional spray tan a day or two before instead. And if you were looking for advice on tanning in the sun, that is a different subject; self-tanner color is cosmetic and does not protect your skin from UV, so you still need sunscreen while wearing it.