Stiff Neck From Desk Work: Setup Fixes and Movement Breaks
A stiff neck after desk work usually comes from a low screen, a long reach for the mouse and hours without moving. Here is which to fix first, and how to fit movement breaks into a working day.
Drafted with AI. This version has not been reviewed by an editor, so it carries no ads — how we work.
A stiff neck after a day at the computer usually traces back to three things: a screen that sits too low, a mouse or keyboard that pulls your arm forward, and long stretches without moving. Fixing the setup removes the constant strain; moving through the day relieves what the setup can't. This guide is for desk workers on laptops or multi-screen setups who finish the day with a tight neck and shoulders but no injury, and it takes the changes in order of impact so you can start with the one most likely to help.
If your neck pain followed a fall, a car accident or a sports collision, or comes with numbness or weakness down an arm or a fever, skip to the last section: that needs a clinician, not a new chair. If the trouble sits mainly in your wrists and hands, it is a different problem, and the questions to ask are covered in telling typing strain apart from early carpal tunnel.
Why desks stiffen the neck and shoulders
Your head is heavy, and the muscles at the back of the neck and across the top of the shoulders, including the upper trapezius and the levator scapulae, hold it up. When your head is balanced over your shoulders, that load is modest. When you tip your chin down toward a low laptop or crane forward to read small text, those muscles work harder to keep your head from dropping, and they do it continuously for hours.
Reaching adds a second load. A mouse parked out to the side, or a keyboard pushed to the back of the desk, draws the shoulder forward and slightly up. Hold that for a morning and the band of muscle between your neck and shoulder blade feels tight and sore by lunch.
The third factor is stillness. Even a good posture becomes uncomfortable when held without a break, because muscles that never change position get fatigued. That is why setup and movement both matter: an ideal desk won't make eight motionless hours comfortable, and frequent breaks can't fully cancel out a screen that keeps your head bent all day.
Where to start: match the symptom to the fix
| What you notice | Likely cause | Change to make first |
|---|---|---|
| The back of your neck aches and you look down at the screen | Monitor or laptop too low | Raise the screen so its top edge is near eye level |
| You lean toward the screen or squint | Screen too far away, text too small, or glasses not suited to screen distance | Bring the screen to arm's length and enlarge the text |
| One side of your neck is tighter than the other | Turning toward an off-center screen, or reaching for the mouse on one side | Center your main screen and bring the mouse in close |
| The tops of your shoulders burn or feel hunched | Armrests or desk too high, keyboard too far away | Lower the armrests or raise the chair, and pull the keyboard in |
| Fine in the morning, stiff by afternoon | Long periods without moving | Add short breaks every 30 to 60 minutes |
Most people recognize themselves in more than one row. We'd still start with the screen, because head position affects your neck every minute you work, then move to the arms, then the breaks.
Step 1: Set monitor height and distance
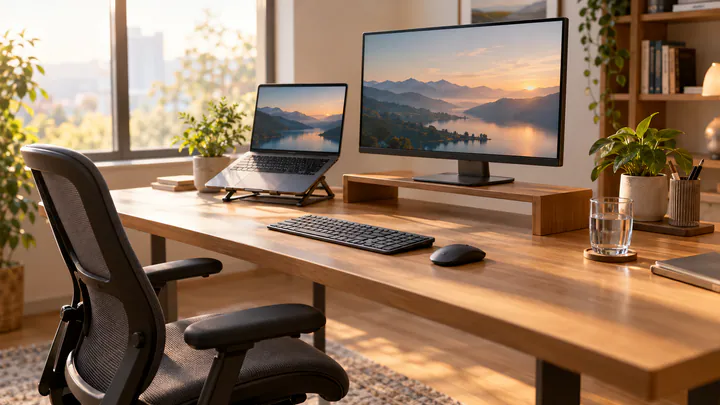
Mayo Clinic's office ergonomics guide puts the monitor straight ahead of you at roughly arm's length, with the top edge of the screen level with your eyes or a little lower. Bifocal wearers get one extra instruction: drop the monitor another 1 to 2 inches, so you aren't tilting your head back to read through the lower part of the lens.
To check yours, sit back in your usual working position and look straight ahead with your head level. Your eyes should land on or just below the top edge of the screen. For distance, stretch one arm forward: your fingertips should reach about to the screen.
If the screen is too low, a monitor riser (roughly $15–$50) or a monitor arm (roughly $30–$150) is the tidy fix; a stack of sturdy books or reams of printer paper does the same job in the meantime. If the screen is too high and its stand won't go lower, take the stand off and set the monitor on a low riser or directly on the desk.
If you catch yourself leaning in after moving the screen back, the text is too small: increase the zoom or display scaling rather than shortening the distance. The American Academy of Ophthalmology's advice on computers and eye strain gives a similar distance, about 25 inches, with the screen placed so your gaze runs slightly downward. It also explains that computer glasses are focused for intermediate range, about 20 to 26 inches from the face, and are not the same thing as blue-light-blocking glasses, so squinting that persists at that distance is worth raising at an eye exam.
Step 2: Place laptops and second screens
Laptops: the one-hour rule
A laptop forces a trade-off: when the keyboard is at a comfortable height, the screen is far too low, and when the screen is high enough, the keyboard ends up near your chin. You can't solve both on the machine itself. Our rule of thumb: for any session longer than about an hour, raise the laptop on a stand or books so the screen meets the height and distance above, and type on a separate keyboard and mouse. A folding laptop stand costs roughly $20–$50, and an external keyboard and mouse set roughly $25–$60.
For short sessions, such as clearing a few emails on a train, the laptop as it is will do; just shift position and look up often. If you have a spare monitor at your desk, the simplest arrangement is to connect the laptop, push it aside or close the lid, and use the monitor as your only screen.
Dual monitors: decide which screen is primary
Where each screen goes depends on how you split your time between them.
- One main screen, one for reference: put the one you use most directly in front of you and the second off to one side, angled toward you, at the same height. You turn your head only for occasional glances.
- Both used about equally: set them side by side with the join between them in line with your nose, both angled slightly inward, so you turn a little each way rather than a lot to one side.
- Laptop plus monitor: treat the larger monitor as the main screen, and either raise the laptop to the same height beside it or keep the laptop screen for things you check now and then, such as chat.
The arrangement to avoid is two screens set up symmetrically when you work mostly on one of them. That leaves your head turned to the same side for hours, which tends to show up as stiffness on one side only.
Step 3: Chair, armrests and a relaxed shoulder line
With the screen sorted, look at your arms. OSHA's guidance on neutral postures for computer work describes a head that is level and facing forward, relaxed shoulders with the upper arms hanging naturally at your sides, and elbows kept close to the body and bent somewhere between 90 and 120 degrees. Your hands, wrists and forearms should run straight and roughly parallel to the floor.
Getting there usually takes these adjustments, in this order:
- Chair height. Set it so your forearms are level with the keyboard when your shoulders are relaxed. If your feet then don't rest flat on the floor, add a footrest or a sturdy box rather than lowering the chair again.
- Sit back. Slide your hips to the back of the seat so the backrest supports you. Perching on the front edge tends to tip your upper body and head forward.
- Armrests. They should just meet your forearms while your shoulders stay down. Armrests set too high push your shoulders up toward your ears; if yours won't go low enough, remove them or swing them out of the way.
- Keyboard and mouse distance. Pull the keyboard toward the front edge of the desk and put the mouse right beside it, close enough that your elbow stays by your side as you use it. A keyboard without a number pad lets the mouse sit several inches closer to your center.
A quick self-check: drop your shoulders, let your arms hang, then bend at the elbows. Your hands should land on the keys without leaning forward, lifting your shoulders or straightening your arms. A standing desk follows the same rules for screen and arms; its real advantage is that it makes changing position easy, not that standing all day is better than sitting all day.
Step 4: Build movement breaks into the workday
Setup cuts the strain; movement deals with the stillness. Research hasn't settled on a single ideal break interval, so treat what follows as a practical pattern rather than a prescription: a brief change of position every 30 to 60 minutes, plus a few longer walks spread across the day.
A micro-break takes a minute or two. Stand up, roll your shoulders backward a few times, gently draw your chin straight back as if making a double chin and release it, squeeze your shoulder blades together and let go, then turn your head slowly to look over each shoulder. Keep every movement slow and within a comfortable range, and drop any that cause sharp pain. While you're up, look at something across the room and blink a few times; people tend to blink less while staring at a screen, so a break rests your eyes as well as your neck.
Illustrative workday with movement breaks
| Time | Break | Brisk walking minutes |
|---|---|---|
| 9:15 | Stand, roll shoulders, refill water | 0 |
| 10:15 | Walk outside or around the building | 10 |
| 11:15 | Take a call standing; chin tucks and head turns | 0 |
| 12:15 | Lunch walk | 15 |
| 1:15 | Shoulder-blade squeezes; look out a window | 0 |
| 2:15 | Stand and stretch while a file loads | 0 |
| 3:00 | Brisk walk up and down the stairs | 5 |
| 4:00 | Stand, reset chair and screen, sit back down | 0 |
That is eight breaks, with no stretch of sitting longer than about an hour. To make them stick, set a recurring calendar alert or timer, or tie breaks to natural endpoints such as finishing a task or hanging up a call. On meeting-heavy days, take audio-only calls standing or walking.
Counting desk-day walks toward weekly activity
The CDC's overview of how much activity adults need sets a weekly goal of at least 150 minutes of moderate-intensity activity, offers 30 minutes on each of 5 days as one way to get there, and separately asks adults for strength work on 2 days a week covering every major muscle group. The walks in the example take care of the first part: 10 + 15 + 5 = 30 minutes a day, and 30 minutes × 5 workdays = 150 minutes a week.
Two caveats. First, intensity matters: a walk counts toward the aerobic goal only if it is brisk enough to raise your breathing and heart rate, so a slow stroll to the printer and the stand-and-stretch breaks don't add to the total, even though they still help your neck. Second, walking does nothing for the strength part of that guidance, so it needs its own time outside these breaks.
If 30 minutes of walking won't fit inside your working hours, the short breaks still do their main job for your neck, and the activity minutes can come before or after work.
Signs neck pain needs medical attention
Ordinary desk stiffness loosens with movement, tends to feel better on days off and eases over the weeks after you change your setup. Some symptoms point to something else and should be checked rather than managed on your own:
- Numbness, tingling or weakness in an arm or hand, or a grip that feels clumsy
- Pain that shoots from the neck down into the arm
- Pain that began after a fall, car accident, sports collision or other injury
- Neck pain or stiffness together with a fever or a severe headache, which calls for prompt care
- Pain that keeps getting worse, wakes you at night, or hasn't improved after a few weeks of setup changes and regular breaks
If any of these apply, or you have a history of neck or spine problems and aren't sure which movements are safe for you, see a doctor or physical therapist, who can examine you and work out what is driving the pain.