
Birdwatching for Beginners: Binoculars, Guides and a Local Patch
Watching one nearby spot every week teaches you more about birds than occasional trips to famous reserves. Here is how to pick that spot, choose 8x42 binoculars, identify what you see and hear, and keep a simple log.
Drafted with AI and published automatically. Our editors set the standards and fix reported errors — how we work.
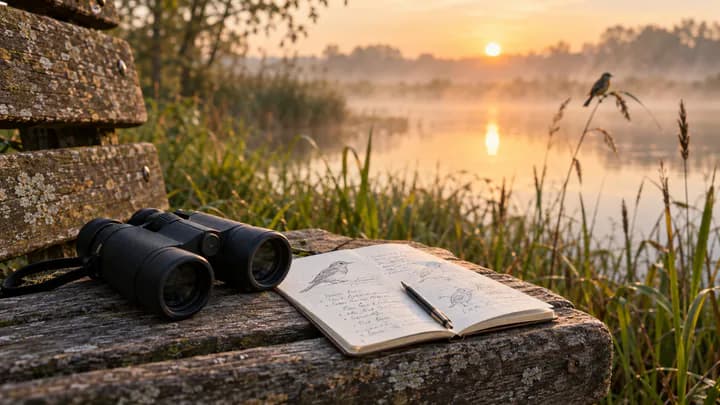
The fastest way to get good at birdwatching is to pick one ordinary spot near home and visit it every week, rather than saving your enthusiasm for trips to famous reserves. A regular patch teaches you what is normal, so anything new stands out, and it costs almost nothing beyond a pair of binoculars. This walkthrough covers choosing that patch, buying a first pair of 8x42 binoculars, identifying birds by shape, behavior and sound, and keeping a simple log that shows your progress. It is written for curious beginners; if you already chase rarities, plan birding trips abroad or mainly want camera gear, you will find little new here.
Choose a patch you can reach in 15 minutes
A good patch is one you will actually visit, so distance matters more than scenery. Somewhere within a 15-minute walk or drive is ideal: a city park with a pond, a cemetery with old trees, a riverside path, a school playing field edged with hedges, or a patch of scrub at the end of your street.
Look for variety packed into a small area. The best beginner patches combine at least two or three habitats, because each one holds different birds:
- Water (a pond, creek or retention basin) brings ducks, herons, swallows and blackbirds.
- Mature trees hold woodpeckers, nuthatches and, in migration, warblers.
- Shrubs and hedges shelter sparrows, wrens and thrushes.
- Open grass attracts robins, starlings and birds of prey hunting overhead.
Keep the route short: a loop you can walk in 45 to 90 minutes. Walk the same route in the same direction each time so your observations are comparable from week to week.
When to go
Go early. Most small birds are busiest in the first two or three hours after sunrise, when they feed after a cold night and sing to hold territory. By late morning, especially in summer heat, activity drops sharply. Late afternoon is a reasonable second choice. Calm, dry mornings are easiest; strong wind keeps small birds low and hard to see, and it drowns out song.
First binoculars: what 8x42 means
Binoculars are the one purchase that matters, and the two numbers printed on them tell you most of what you need. In 8x42, the 8 is the magnification: a bird appears eight times closer than with the naked eye. The 42 is the diameter of each front (objective) lens in millimeters. Bigger lenses gather more light, which gives a brighter image at dawn, under trees and on gray days.
For a beginner, 8x is easier to use than 10x for three reasons:
- Wider view. Lower magnification shows a wider slice of the scene, so it is easier to find a bird that has just hopped to a new branch.
- Steadier image. Magnification enlarges hand shake as well as the bird. At 10x, the image jitters noticeably; at 8x, it settles more easily.
- Brighter image. Divide the lens size by the magnification to get the exit pupil, the beam of light reaching your eye. An 8x42 gives 5.25 mm (42 ÷ 8); a 10x42 gives 4.2 mm (42 ÷ 10). The larger figure looks brighter in poor light.
| Size | Exit pupil | Strengths | Drawbacks |
|---|---|---|---|
| 8x42 | 5.25 mm | Wide, bright, steady; works in most light | Heavier, often 22–30 oz |
| 8x32 | 4 mm | Lighter and smaller; good for long walks | Slightly dimmer at dawn and in woods |
| 10x42 | 4.2 mm | More detail on distant birds over water | Narrower view, more shake |
| Compact 8x25 or 10x25 | 3.1 mm or 2.5 mm | Pocketable | Dim and tiring to use for long |
Features worth paying for
A solid first pair of roof-prism 8x42s typically costs roughly $100–$300. Below that range, glass quality and focusing often suffer. Check for these before buying:
- Waterproof and fog-proof construction, usually described as sealed and filled with nitrogen or argon.
- Close focus of about 6–8 feet, useful for birds in a nearby bush.
- Eye relief of 15 mm or more with twist-up eyecups if you wear glasses.
- A smooth central focus wheel that turns from near to far in about one to two turns.
Skip zoom binoculars and anything advertising very high power; both give dim, shaky views. If you can, try a pair in a store or borrow one on a local bird club walk before spending.
Setting them up once
- Fold the barrels until you see one clear circle, not two.
- Leave the eyecups up if you do not wear glasses; twist them down if you do.
- Close your right eye and focus on a sign or branch with the center wheel.
- Close your left eye and adjust the diopter ring (usually near the right eyepiece) until the same object is sharp.
- Note the diopter setting and leave it there.
To get a bird in view, keep your eyes locked on it and bring the binoculars up to your eyes without looking away. Scanning through the binoculars to find it rarely works.
The four keys to identifying a bird
Beginners tend to look for colors first, but experienced birders often name a bird before they have seen its colors at all. Work through these four keys in order.
1. Size and shape
Compare every unknown bird with a few you already know. In North America, a House Sparrow is roughly 6 inches long, an American Robin about 10 inches and an American Crow about 17 inches. Is your bird sparrow-sized, robin-sized or crow-sized? Then look at the outline: a thick seed-cracking bill or a thin insect-picking one, a long or short tail, a round head or a crest, long legs or short.
2. Behavior
How a bird moves narrows the options fast. Woodpeckers hitch up trunks using their tails as props; nuthatches creep headfirst down them. Robins run, stop and cock their heads on lawns. Flycatchers sally out from a perch and return to it. Flight style counts too: finches bound up and down, while swallows twist and swoop.
3. Habitat
Where you see it rules many species in or out. A small brown bird skulking in cattails is probably not the same species as one hopping on a mown lawn. Region and season matter as well, which is why a regional field guide beats a continental one.
4. Field marks
Only now look at details: wing bars, an eye ring, a stripe over the eye, streaks on the breast, a patch of color on the rump or tail. Two or three field marks, combined with the first three keys, usually settle the identification. Write them down before the bird flies.
Learn a few common songs first
At your patch you will hear far more birds than you see, so learning sounds multiplies what you can record. Do not try to learn dozens. Start with the three to five birds you hear most often, and learn them well enough to recognize without thinking.
Memory phrases help. In much of North America, useful starters include the American Robin's caroling phrases, often remembered as cheerily, cheer-up, cheerio; the Black-capped Chickadee's clear two-note fee-bee and its namesake chick-a-dee-dee-dee call; the Northern Cardinal's loud, whistled cheer, cheer, cheer or birdie, birdie, birdie; and the Mourning Dove's soft, hooting coo. Once those are automatic, any unfamiliar sound becomes a puzzle worth tracking down.
Spring mornings are the best time to practice, when the dawn chorus is at its fullest. Stand still for five minutes, pick out one voice, and follow it until you see the singer.
Using a field guide or ID app without leaning on it
A regional field guide, either illustrated or photographic, is still the best study tool. Illustrated guides show the key marks side by side on a standard pose, which makes comparing similar species easier; photographic guides show birds as they actually look, in varied light. Read the pages for your patch's common birds at home, before you see them.
Free identification apps can suggest a species from a photo or a recording of song. They are useful, but they misidentify birds, especially in noisy places or with distant or partial views. Treat an app's answer as a lead to check, not a verdict: confirm it by seeing the bird or matching its shape, behavior and habitat yourself.
A simple routine keeps you learning rather than outsourcing: watch the bird first and note its size, shape, behavior and two or three field marks. Only then open the guide or app. The habit of looking closely is the skill you are building.
Keep a simple patch list
A patch list is a running record of every species you have seen at your spot, and a weekly log behind it shows how the patch changes through the seasons. A pocket notebook or a spreadsheet works; so do the free online checklist databases run by conservation groups, which also add your sightings to wider records of where birds occur.
Record the same basics every visit: date, start and end time, weather and temperature, each species, and how many of each. Mark birds you are unsure of with a question mark rather than guessing.
| Species | Sat Apr 6 | Sat Apr 13 | Sun Apr 21 |
|---|---|---|---|
| Time and weather | 6:45–7:45, clear, 48°F, light wind | 6:30–7:30, overcast, 52°F, calm | 7:00–8:00, light rain, 50°F |
| American Robin | 6 | 5 | 3 |
| Northern Cardinal | 2 | 2 | 0 |
| Song Sparrow | 3 | 4 | 2 |
| Mourning Dove | 4 | 0 | 0 |
| Red-winged Blackbird | 12 | 15 | 9 |
| Tree Swallow | 0 | 8 | 20 |
| Downy Woodpecker | 0 | 1 | 0 |
| Yellow-rumped Warbler | 0 | 0 | 6 |
After these three visits, the patch list stands at eight species. The log also shows the story behind it: Tree Swallows first appeared on April 13 and more than doubled by April 21 (from 8 to 20), and warblers arrived with the rain. Next spring, those dates give you something to compare against, which is where a local patch pays off.
For flocks too big to count one by one, count a block of 10 birds, judge how many similar blocks the flock contains, and multiply. A flock that looks like about six blocks is roughly 60 birds (6 × 10). Estimates are fine; note them with a tilde, such as ~60.
Over months, keep two extra lines at the top of your notebook: your total species for the patch, and the first date you saw each migrant. Those two lines are the visible progress that turns a few walks into a lasting habit.
Etiquette around nests and wildlife
The bird's welfare comes before your sighting. Laws protecting wild birds and their nests vary from place to place, and good practice goes further than any legal minimum.
- Keep your distance from nests. Watch from far enough away that the adults carry on normally. If a bird gives repeated alarm calls, circles you, dives at you or holds food in its bill without going to the nest, you are too close; back away slowly.
- Do not use playback during breeding season. Playing recorded songs to draw a bird out makes it think a rival has arrived, pulling it away from feeding young and guarding its nest. Many parks and reserves ban it outright; check posted rules.
- Stay on paths and do not push through vegetation to get a better look, which can expose nests to predators.
- Do not flush roosting birds, especially owls resting in daylight. If a bird moves because of you, you have disturbed it.
- Keep nest and roost locations to yourself rather than posting them online, where they can draw crowds.
- Respect private land and other people using the space; a park at 7 a.m. still belongs to dog walkers and runners.
Follow these and your patch stays a place birds keep using, which is the whole point of watching it week after week.