How to Finish Your First 1,000-Piece Jigsaw Puzzle
A beginner's system for a first 1,000-piece puzzle: the space and light it needs, how to sort the pieces, the order to build in, and how to pack it away between evenings on a small table.
Drafted with AI. This version has not been reviewed by an editor, so it carries no ads — how we work.
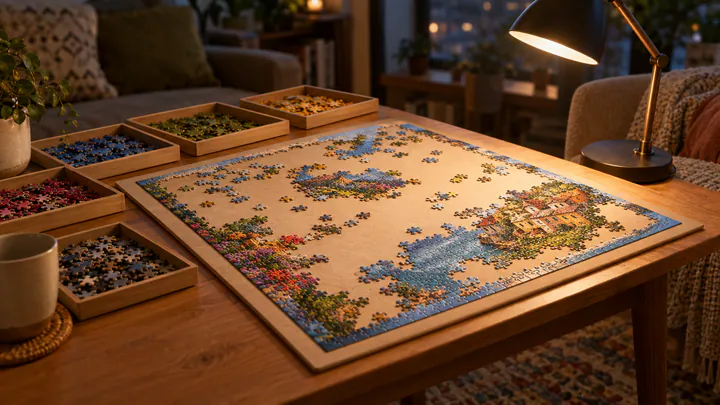
The way to finish a first 1,000-piece puzzle is to stop treating it as one big task and work through it in a fixed order: flip every piece, pull out the edges, build the frame, sort the middle into trays by color, then assemble one section at a time over several evenings. This walkthrough is for anyone looking at a new box and wondering where to begin, and where the whole thing goes when the table is needed for dinner. It is not aimed at speed puzzlers or at parents choosing puzzles for young children, whose piece counts and methods are different.
Space and lighting a 1,000-piece puzzle needs
A finished 1,000-piece puzzle usually measures around 50 × 70 cm, which is about 20 × 27.5 inches. Check your box, because sizes vary by maker, but plan on a work surface noticeably larger than the finished picture. Loose pieces spread face up take far more room than the same pieces locked together, and you also need space for sorting trays.
A practical minimum is a board or mat of about 24 × 32 inches for the puzzle itself, plus somewhere beside it for trays. A typical square card table fits the finished puzzle but leaves little room for anything else, so on a small table you will lean heavily on trays that stack or sit on a nearby chair or shelf.
Light matters as much as space. Glossy pieces throw glare under a single overhead light, and that glare hides the subtle shade differences you need in skies and shadows. Two light sources work better than one: general room light plus a lamp angled in from the side. Bulbs sold as daylight, usually labeled 5000K or higher, make colors easier to tell apart in the evening than warm yellow bulbs do. Sit so the lamp is not behind your head casting a shadow on the pieces.
Flip, sort and separate the edge pieces
Start by turning every piece face up. It feels slow, but it is the one job that makes everything after it faster, and it is the natural moment to pull out edge pieces. Work through the box a handful at a time, so pieces don't slide around the table.
- Tip a small handful onto the table, not the whole bag.
- Turn each piece picture side up.
- Put any piece with a straight side into a separate tray. Corners, with two straight sides, go in the same tray.
- Slide the rest into a general pile, or straight into rough color trays if an obvious group stands out, such as a red barn or a blue sky.
- Check the bag and box corners for pieces stuck together face to face. Freshly cut pieces sometimes cling in pairs.
For trays, rimmed baking sheets, shallow food-storage lids, paper plates and the box lid itself all work. Purpose-made stackable sorting trays cost roughly $15 to $30 and earn their space on a small table because they stack. Six to ten containers is plenty for most images.
How many edge pieces to expect
Most 1,000-piece puzzles are cut on a grid of about 40 pieces by 25. The edge count for any grid is two times the long side plus two times the short side, minus the four corners you would otherwise count twice:
Worked example: 40 × 25 grid → (2 × 40) + (2 × 25) − 4 = 80 + 50 − 4 = 126 edge pieces.
Some puzzles sold as 1,000 pieces use a slightly different grid, such as 38 × 27, which gives 1,026 pieces. The edge count comes out the same: 76 + 54 − 4 = 126. If you have found far fewer than about 126 edge pieces, keep looking in the middle pile before you start building; one or two usually hide there, especially pieces where the straight side runs along a dark or busy part of the picture.
Building the frame first
The border gives you the exact size and position of the finished picture, which stops you building sections that later turn out to sit in the wrong place. Lay out the four corners where they belong on your mat or board, using the box lid to judge the proportions, then sort the edge pieces into four rough groups by which side of the picture their colors match.
Join each side outward from its corner. Where a run of edge pieces looks identical, such as a long stretch of plain sky along the top, compare the knobs and holes on the inner side: neighboring edge pieces alternate in a regular pattern on a grid-cut puzzle. If one side won't close, leave a gap rather than forcing it. A missing edge piece will turn up later in the middle pile, and a forced fit throws the whole side out of line.
Once the frame is closed, count the pieces along one long side and one short side. That tells you your puzzle's real grid, which is useful later when you are hunting for a single gap.
Frame-first is not the only method. Some puzzlers build distinctive objects first and add the border at the end. For a first puzzle, though, we'd start with the frame: it gives quick, visible progress in the first evening and a fixed reference for everything else.
Sorting the middle by color, texture and piece shape
With the frame done, everything left in the box is an interior piece: 874 on a 40 × 25 grid (1,000 − 126), or 900 on a 38 × 27 grid (1,026 − 126). Sort them into groups you can work through one tray at a time. Start broad, then split any tray that ends up with more than roughly 150 pieces, because a tray that full is hard to search.
Color and printed detail
Sort first by the strongest color groups in the image: sky, water, foliage, buildings, a red object. Pieces with printed lettering, faces, windows or hard lines between two colors are especially valuable, so give them their own tray. They connect sections together and are often the fastest wins.
Texture
When two areas share a color, texture separates them. Brushstrokes in a painting, the fine pattern of leaves against the smooth gradient of a sky, grain in wood, ripples in water: look at the surface pattern, not just the shade.
Piece shape, for skies and solid areas
When color and texture run out, sort by shape. On a grid-cut puzzle, each interior piece has four sides, and each side is either a knob (sticking out) or a hole (cut in). That gives a small set of shape families:
- Four knobs or four holes.
- Two knobs and two holes, either on opposite sides or on adjacent sides. These are worth keeping in separate piles.
- Three knobs and one hole, or three holes and one knob.
When you look at a gap in a plain area, you can see which shape family must fill it, so you only test pieces from that pile instead of the whole tray. Many grid-cut puzzles also repeat a regular pattern of shapes across rows, so once you have a few rows of sky, the next row's shapes become predictable. This works less well on random-cut puzzles, where piece outlines vary freely; there, the angle and size of each knob become the clues instead.
Working section by section across several evenings
Build from the most distinctive areas toward the plainest. Begin where the picture has strong lines, lettering or objects, connect those sections to the frame, and leave large single-color areas such as sky, sea or shadow for last, when they are surrounded and the shape method has the most to grip.
Keep the box lid propped up where you can see it, or photograph it on your phone so you can zoom in on a detail. Work one tray at a time, and move each finished cluster to its approximate place inside the frame even before it connects. Seeing where it sits often shows which tray to open next.
A first 1,000-piece puzzle is realistically a project of several evenings, not one sitting, and the total varies widely with the image. Sessions of an hour or two keep it enjoyable and help you return with fresh eyes, which matters more than people expect when matching shades.
| Evening | Main job | Where you stop |
|---|---|---|
| 1 | Flip all pieces, pull edges, start color trays | Edge tray complete; middle roughly sorted |
| 2 | Build the frame; refine color trays | Frame closed or nearly closed |
| 3 | Lettering, objects and hard color boundaries | Two or three islands placed inside the frame |
| 4 | Grow islands and connect them to the frame | Busy areas mostly done |
| 5 | Medium areas such as foliage or buildings; sort plain areas by shape | Only large plain areas left |
| 6 | Sky, water and shadow, row by row | Finished, or a handful of gaps |
Your puzzle may take fewer or more evenings. The order matters more than the pace.
Storing a half-done puzzle on a small table
The rule for working on a table you also eat or work at is simple: never build directly on the tabletop. Build on something you can lift, so clearing the table takes a minute, not an evening's progress.
A rigid board
A sheet of foam board, hardboard or thin plywood about 24 × 32 inches is the most reliable option. Sizes in that range from a craft or hardware store usually cost roughly $10 to $25. At the end of a session, lift the board and slide it flat under a bed, on top of a wardrobe or behind a sofa. A second board of the same size laid on top protects the pieces from pets and dust, and lets you flip the puzzle sandwich if you ever need to see the back. If storage is tight, the same thinking applies as in the wider question of making a small home work harder: vertical and under-furniture space is where flat projects can live.
A roll-up felt mat
A felt mat with an inflatable or foam tube rolls the puzzle up for storage in a drawer or closet. It takes up the least space, but it has trade-offs. Assembled sections hold together well; loose pieces scattered on the mat can shift or fall out. Roll slowly and evenly, keep the roll fairly loose, and unroll it within a few days. Mats generally cost roughly $15 to $35.
The trays
Stackable trays go on a shelf or chair. If yours don't stack, a large shallow box can hold them, or you can tip each color group into a labeled zip-top bag at the end of a session. Keep everything away from direct sun, which can fade printed pieces over a long project, and out of reach of pets that chew cardboard.
When you find a missing piece or you're stuck
Most apparently missing pieces aren't missing. Before deciding one is gone, check, in this order: the floor and chair seat, the folded flaps and corners of the box, the empty bag, the bottoms of your trays, any pieces stuck together face to face, and every piece already placed nearby. A piece that looks right but sits slightly raised or leaves a hairline gap is often in the wrong spot, and its true home is the one you can't fill.
Count from the frame to locate a gap precisely. Knowing a hole is in row 14, column 22 tells you exactly which neighbors it must match. If a piece really is gone, some puzzle makers will replace pieces on request; the box or the maker's website usually says whether they do.
A routine for getting unstuck
When nothing has fitted for ten minutes or more, change something rather than staring harder:
- Rotate the puzzle or walk to the other side of the table. Seeing the image upside down makes you look at shape and shade instead of the picture you expect.
- Change the lighting. Move the lamp to the other side, or add a second one. Glare often hides the difference between two near-identical blues.
- Switch sections. Put the stubborn tray aside and work an easier area for a while. The finished neighbors often make the hard area easier when you come back.
- Sort the stuck tray by shape, then test pieces systematically along one row, one shape family at a time.
- Stop for the night. Matches that seemed impossible at the end of a long session are often obvious the next evening.
What to do with it when it's done
Once the last piece goes in, you have three choices: break it up and box it for another time, pass it on, or keep it. To keep it, puzzle glue brushed onto the surface turns it into one sheet that can be mounted on board and framed; standard frames sized close to 20 × 28 inches suit many 1,000-piece puzzles, but measure yours first. If you break it up instead, bag the pieces and tape the bag shut so the next person starts with every piece.