TV Picture Modes Compared: Standard, Vivid, Movie and Filmmaker
A side-by-side look at TV picture modes, which one to pick, and the few settings worth changing in ten minutes: motion smoothing, color temperature, sharpness and game mode.
Drafted with AI. This version has not been reviewed by an editor, so it carries no ads — how we work.
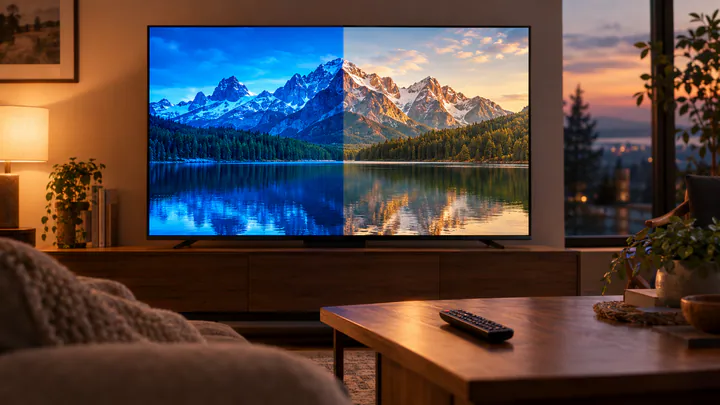
If your new TV looks too blue, too bright or strangely smooth, switch it to Filmmaker Mode or Movie (sometimes called Cinema) mode, turn off motion smoothing, and leave most other sliders alone. Those three changes fix the majority of complaints new owners have, and they take a few minutes. The rest of this guide compares the preset modes side by side, explains why the factory settings look the way they do, and walks through a short setup routine. It is aimed at people who want a natural picture quickly, not at enthusiasts planning a full calibration with a meter; they will want a dedicated professional calibration guide.
Why stores ship TVs on Vivid
A TV on a store wall competes with dozens of others under bright overhead lighting, so manufacturers tune their showroom settings to grab attention: maximum backlight, boosted color saturation, a cool blue-white tint and heavy sharpening. In a bright store that reads as punchy. In a living room at night it reads as harsh, with skin tones that look sunburned or plastic and whites that look icy.
Many TVs ask during first setup whether you are using them at home or in a store. If someone picked the store, retail or demo option, the set may lock into its brightest mode and reset your changes every time it turns on. If your adjustments keep disappearing, look for that option in the general or system settings and switch it to home use before doing anything else.
Home sets usually default to Standard or an energy-saving mode instead, which is less extreme than Vivid but still tuned for brightness and impact rather than accuracy.
Standard, Vivid, Movie and Filmmaker Mode side by side
Every brand names its presets slightly differently, but most TVs offer some version of these four. The table shows how they typically behave out of the box; exact values vary by model.
| Mode | Brightness | Color temperature | Motion smoothing | Sharpening and extra processing | Best for |
|---|---|---|---|---|---|
| Vivid / Dynamic | Maximum | Cool (bluish) | Often on | Heavy | Store displays; very bright sunlit rooms in a pinch |
| Standard | High | Cool to neutral | Often on | Moderate | Casual daytime viewing if you dislike a dimmer picture |
| Movie / Cinema | Moderate | Warm | Usually off or low | Light | Films and TV shows, especially in dim rooms |
| Filmmaker Mode | Moderate | Warm | Off | Off or minimal | Watching content close to how it was mastered |
Filmmaker Mode is a preset supported by many recent sets from major brands. Its defining feature is that it switches off motion smoothing, extra sharpening, noise reduction and similar processing by default, and uses a warm color temperature, so the picture is presented largely as the studio delivered it. Some TVs can switch into it automatically when the content signals that it should.
If your TV has no Filmmaker Mode, Movie or Cinema mode gets you most of the way there; on some brands a mode called Custom, Expert or Professional serves the same purpose. You may need to turn motion smoothing and sharpening down yourself in those modes, which the sections below cover.
The trade-off is brightness. Movie and Filmmaker modes can look dim and slightly yellow for the first day, mainly because your eyes are used to the blue cast of Vivid. Give it a few evenings before deciding. If the room is genuinely bright, raise the backlight within Movie or Filmmaker Mode rather than going back to Vivid; you keep the accurate colors and gain light.
Motion smoothing and the soap opera effect
Motion smoothing is the setting most responsible for the soap opera effect, where films look like cheap video and camera pans seem to glide unnaturally. Most movies and scripted shows are shot at 24 frames per second. A TV refreshing at 60 or 120 times per second has to repeat or invent frames to fill the gaps, and motion smoothing (technically frame interpolation) generates new in-between frames by guessing what the motion should look like. The result is smoother but no longer looks like film, and fast action can show smeared edges or flickering artifacts where the guess goes wrong.
Each brand buries it under its own name:
- Samsung: Auto Motion Plus, found within the Picture Clarity settings on many newer models.
- LG: TruMotion.
- Sony: Motionflow.
- Other brands: look for words like motion, smooth, clarity or judder in the advanced picture menu.
For films and drama, set it to Off. Some sets also offer a judder reduction slider separate from blur reduction; if 24-frame content looks stuttery on pans with everything off, a low judder setting (one or two steps) can help without bringing back the soap opera look. Blur reduction settings that use black frame insertion can make motion crisper but often dim the picture and can cause visible flicker for some people, so leave them off unless you like the result.
Color temperature: cool versus warm
A picture that looks too blue is almost always a color temperature problem, not a color saturation one. Color temperature sets the tint of white: Cool leans blue, Warm leans red-yellow. Films and TV shows are mastered on displays set to a standard white point called D65, which corresponds to roughly 6,500 Kelvin, a slightly warm daylight white. TV presets labeled Cool or Standard usually sit well above that, which is why whites look icy.
The Warm settings are typically the closest to D65. Many sets offer two or more warm levels (labeled Warm 1 and Warm 2, or Expert 1 and 2, or a numbered scale); the warmer of these is often the one tuned nearest to D65, though it varies by model. Movie and Filmmaker modes usually select it automatically. If whites look slightly creamy against your walls or phone screen, that is expected; your phone is probably set cooler.
Leave the detailed white balance controls (the two-point or multi-point red, green and blue gain sliders) alone. Adjusting those by eye tends to introduce tints you then chase around the menu, and they are the part of the job that genuinely needs a meter.
Brightness, contrast and sharpness: what to leave alone
In Movie or Filmmaker Mode, most of the basic sliders are already close to where they should be. Here is how to treat each one.
Backlight or OLED light
This control sets how much light the screen puts out, and it is the one you should feel free to change. Raise it for a bright daytime room, lower it for night viewing. It does not affect color accuracy much, so it is the right way to make a dim-looking mode brighter.
Brightness
On many TVs, the slider labeled Brightness controls the black level, not overall light output. Raise it too far and blacks turn gray; lower it too far and dark detail vanishes into the shadows. Leave it at the mode's default. On some newer sets Brightness does control light output instead, which you can tell by watching whether the whole picture gets brighter or just the shadows.
Contrast
Contrast sets how bright the brightest parts of the picture get. Pushing it up can flatten bright detail in clouds and snow. The default in Movie or Filmmaker Mode is usually sensible.
Sharpness
Sharpness is the slider most worth turning down. It does not add detail; it exaggerates edges, which creates thin bright outlines, or halos, around people and text. Set it to zero or to its neutral point. On some TVs the neutral point is zero; on others it sits partway up the scale, and going lower softens the image. If you see halos around a dark figure against a bright sky, keep lowering it until they disappear.
Extra processing
Dynamic contrast, black enhancers, edge enhancement, "live color" and similar boosters mostly make the picture look like Vivid again. Turn them off. Noise reduction can help with low-quality cable or old DVD sources, but on clean streaming and disc content it smears fine texture, so leave it off and use it only for a source that looks grainy or blocky. Energy-saving modes and ambient light sensors can dim the picture unexpectedly; switch them off if the brightness keeps shifting.
Separate settings for game mode and sports
Game mode trades processing for speed. Every enhancement your TV applies takes time, which shows up as input lag, the delay between pressing a button and seeing the result. Game mode skips most of that processing so the screen responds faster, which matters for fast games. It may look a little less refined than Movie mode, and some sets let you warm up its color temperature and turn its sharpness down just as you would elsewhere.
Many TVs and consoles support an automatic low-latency mode over HDMI that switches the set into game mode when a game starts. If yours does, enable it on the TV and you will rarely have to think about it.
Sports are the one case where a little motion smoothing can be a reasonable choice. Live sports are usually broadcast at higher frame rates than films, so interpolation has less guessing to do, and some people prefer the smoother ball tracking. Try a low setting in a dedicated Sports mode or a custom mode you use only for games, and keep it off for everything else.
Settings are saved per input
Most TVs store picture settings separately for each HDMI port and for built-in apps. Fixing the picture on your streaming box does not fix it on your game console or cable box. Some sets offer an option to apply settings to all inputs; if yours does not, repeat the routine on each one.
HDR content adds another layer. When an HDR or Dolby Vision signal arrives, many TVs switch to a separate set of HDR picture modes with their own settings. Start an HDR movie or show and repeat the mode choice and motion smoothing check while it plays.
A ten-minute setup routine
- Confirm home mode. Make sure the TV is not set to store, retail or demo use (about one minute).
- Pick the mode. Choose Filmmaker Mode. If it is missing, choose Movie, Cinema or your brand's Custom or Expert mode (one minute).
- Turn off motion smoothing. Find Auto Motion Plus, TruMotion, Motionflow or your brand's equivalent and set it to Off (one minute).
- Check color temperature. Make sure it is on a Warm setting, the warmest of the warm options if unsure (one minute).
- Lower sharpness. Set it to zero or neutral; check for halos around faces and text (one minute).
- Switch off extras. Dynamic contrast, edge enhancement, noise reduction and energy saving go off (two minutes).
- Set light output for your room. Adjust backlight or OLED light, not the color or contrast sliders, until the picture is comfortable (one minute).
- Repeat per input. Switch to each HDMI device and built-in app you use, and set game mode on the console input (two minutes, plus a check during HDR playback).
If something still looks wrong after that, check the source before the TV: a streaming box set to the wrong resolution or forcing its own color settings can undo good TV settings. And if you want the picture measured and tuned beyond these presets, that is the point where a professional calibration with a meter is worth considering.