Four-in-Hand, Half-Windsor or Windsor: Which Tie Knot When
Pick the right tie knot by your collar spread, tie thickness and height. A side-by-side comparison of the four-in-hand, half-Windsor and Windsor, with steps, a matching rule and length fixes.
Drafted with AI; reviewed by Najam Kausar on . How we work.
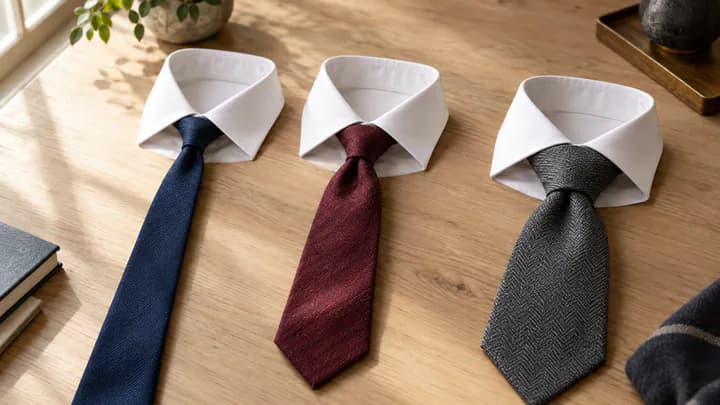
The right tie knot is the one that fills the space between your collar points and leaves the tip of the tie at your belt buckle, and that depends far more on your collar spread, the thickness of your tie and your height than on how formal the occasion is. If you wear a tie only a few times a year, for an interview, a wedding or a court date, you need just one of three knots: the four-in-hand, the half-Windsor or the Windsor. Below they are compared side by side, with a simple rule for picking one and fixes for a tie that finishes too long or too short.
Bow ties and decorative knots such as the Eldredge are left out. These three cover almost every shirt and tie you are likely to own.
What changes between knots: size, symmetry and length used
All three knots are built on the same frame. The wide end of the tie wraps around the narrow end, forms a horizontal band across the front, and finishes by passing down through that band. What differs is how many extra trips the wide end makes through the loop around your neck.
Each extra pass does three things at once: it makes the knot bigger, it makes it more symmetric, and it uses up more of the tie's length. That last point is the one most people overlook. Most off-the-rack ties run roughly 57 to 59 inches, so a knot that eats more fabric leaves less hanging down the front, which is why the same tie can end at your belt with one knot and above your navel with another.
| Knot | Size and shape | Symmetry | Best collar match | Tie length used | Suits |
|---|---|---|---|---|---|
| Four-in-hand | Small, narrow, slightly elongated | Asymmetric; leans to one side | Point collars, narrow button-downs | Least | Thick wool, knit or wide ties; taller wearers |
| Half-Windsor | Medium, neat triangle | Symmetric | Semi-spread and most standard collars | Moderate | Medium-weight silk ties; average height |
| Windsor | Large, wide triangle | Symmetric | Wide spread and cutaway collars | Most | Thin silk ties; shorter wearers |
The directions below assume the wide end starts on your right and the seam of the tie faces your shirt. Tie it in front of a mirror with your collar up and your top button fastened.
Four-in-hand: the slim, slightly asymmetric default
The four-in-hand is the smallest and quickest of the three, and it uses the least tie length. Its slight lean to one side is part of its character, not a mistake. It suits point collars, whose tips sit close together and leave little room for a bulky knot, and it is the right choice for thick ties in wool, cashmere or knitted silk, which turn lumpy in anything larger. Because it consumes so little fabric, it is also the knot most likely to get a standard tie down to the belt on a tall wearer.
- Drape the tie around your neck with the wide end hanging well below the narrow end. As a starting point, put the narrow tip roughly level with your navel; you will fine-tune this after the first try.
- Cross the wide end over the narrow end, from right to left.
- Bring the wide end behind the narrow end, back to the right.
- Cross it over the front again, right to left. This forms the band that becomes the face of the knot.
- Bring the wide end up through the neck loop from underneath.
- Pass the tip down through the front band, holding the band open with a finger.
- Hold the narrow end and slide the knot up until it sits snugly against your collar.
Half-Windsor: the medium symmetric middle ground
The half-Windsor adds one pass through the neck loop on one side, which squares up the knot into a tidy, symmetric triangle of medium size. It works with most collars, from a standard point to a moderate spread, and with the medium-weight silk ties that make up most people's collections. If you own one dress shirt and one tie and want a single knot to learn, this is the one we'd start with.
- Drape the tie as before, but start with the narrow tip a couple of inches higher than you would for a four-in-hand, since this knot uses more length.
- Cross the wide end over the narrow end, from right to left.
- Bring it behind the narrow end, back to the right.
- Bring the wide end up into the neck loop and back down on the same side.
- Cross it over the front, from right to left, to form the front band.
- Bring it up through the neck loop from underneath.
- Pass the tip down through the front band and slide the knot up to the collar.
Windsor: the wide triangle for spread collars
The Windsor, sometimes called the full or double Windsor, wraps through the neck loop on both sides. The result is the largest, most symmetric knot of the three, a broad triangle that fills the wide gap of a spread or cutaway collar, where a small knot would look lost and leave the collar band showing. It uses the most length, so it pairs best with thinner silk ties, which stay neat through all the extra wraps, and with shorter wearers who have more tie than they need.
- Drape the tie with the narrow tip a few inches higher again than for a half-Windsor, so the wide end hangs low.
- Cross the wide end over the narrow end, from right to left.
- Bring it up into the neck loop from underneath and back down on the left.
- Pass it behind the narrow end, to the right.
- Bring it up into the neck loop and back down on the right.
- Cross it over the front, from right to left, to form the front band.
- Bring it up through the neck loop from underneath.
- Pass the tip down through the front band and slide the knot up to the collar.
With a thick tie, a Windsor can grow so large that it pushes the collar points apart and looks heavy. If that happens, drop to a half-Windsor.
Matching knot to collar, tie fabric and height
Three questions settle it: how far apart your collar points sit, how thick your tie is, and how much tie you have to spare. Turned into a rule:
- Narrow collar, thick tie or tall frame: four-in-hand.
- Wide collar, thin tie or shorter frame: Windsor.
- Somewhere in between, or unsure: half-Windsor.
To read your collar, button the shirt and look at the angle between the points. If they angle sharply downward with a narrow gap, it is a point collar. If they flare outward toward your shoulders, it is a spread; if they run nearly horizontal, a cutaway. Button-down collars are usually narrow and suit a four-in-hand or half-Windsor, since a big knot bulges under the buttoned points.
For tie thickness, pinch the blade between finger and thumb. A thin, supple silk tie needs a bigger knot to look substantial; a thick, spongy wool or knit tie already has bulk and wants the smallest knot.
Height matters because of length, not looks. A long torso needs more tie hanging down the front, and a larger neck uses more fabric just to get around it. Both push you toward the four-in-hand. A shorter torso leaves surplus that a Windsor absorbs neatly instead of letting the tip dangle below the belt.
When the factors disagree
Let the collar decide the look, then check whether the length works. Say you are tall, with a spread collar and a thin silk tie: the collar calls for a Windsor, but a standard tie may finish well above your belt. Try a half-Windsor first. If it still falls short, an extra-long tie, usually around 61 to 63 inches, lets you tie the Windsor properly.
Or say you are on the shorter side with a point collar and a medium silk tie. The collar wants a small knot, but a four-in-hand might leave the tip hanging past your buckle. A half-Windsor uses up the extra length without overcrowding the narrow collar.
Which knot for an interview, wedding or court date
Formality barely separates these knots; any of the three is acceptable in a suit. What reads as polished in a job interview or courtroom is a knot that is tight, centered, fills the collar and ends at the belt. With a typical business shirt and a plain silk tie, that usually means a half-Windsor. At a wedding, follow the same rule, but match the knot to whatever collar your shirt has, since dressier shirts are more often cut with a spread.
Whatever the knot, the top button should be done up and hidden, and the knot should sit high enough that no collar band shows above it.
Getting the tip to the belt
The tip of the wide blade should land at your belt buckle, touching it or reaching its middle. Above the waistband looks cropped; well below the buckle looks sloppy. The narrow end should finish slightly shorter than the wide end and be tucked through the keeper loop on the back of the wide blade so it stays hidden.
If the tie ends up too long
- Switch to a larger knot, which uses more fabric: four-in-hand to half-Windsor, or half-Windsor to Windsor.
- Or keep the same knot and start with the narrow end lower, so less of the wide end is left over.
If the tie ends up too short
- Switch to a smaller knot: Windsor to half-Windsor, or half-Windsor to four-in-hand.
- Or keep the knot and start with the narrow end higher, giving the wide end more to work with.
The arithmetic is simple because the knot's position is fixed at your collar. Whatever length you slide from the narrow side to the wide side before tying ends up on the front blade, so moving the starting point by about an inch changes where the tip lands by about an inch. If the tip finished 2 inches above your buckle, slide the tie roughly 2 inches toward the wide side and retie. Expect two or three attempts with a new tie, then note where the narrow tip sits at the start (a shirt button is an easy marker) so you can repeat it.
If the narrow end hangs below the wide end, the tie started too far toward the narrow side; retie rather than tucking the excess into your trousers.
Adding a dimple
A dimple is the small fold just below the knot that makes the blade curve outward slightly. It is optional, but it gives a silk tie a finished look and helps the knot hold its shape. Form it during the final tightening:
- With the knot still loose, after passing the wide end down through the front band, press your index finger into the center of the blade just below the knot.
- Pinch the edges of the blade around that finger with your thumb and middle finger, so the fabric folds into a shallow crease.
- Keep pinching while you pull the narrow end down with your other hand and slide the knot up to the collar. The knot locks the fold in place.
- Check in the mirror that the dimple is centered; if it has slipped to one side, loosen and repeat.
Thin and medium silk ties take a dimple easily. Thick knit ties rarely hold one, and they look fine without it.