Curtain Rod Height and Panel Width: Measure Before You Buy
Most curtains look cheap because the rod sits too low and too narrow and the panels are too skimpy. Compare mounting heights, rod widths, fullness and lengths, then turn one window's numbers into a shopping list.
Drafted with AI and published automatically. Our editors set the standards and fix reported errors — how we work.
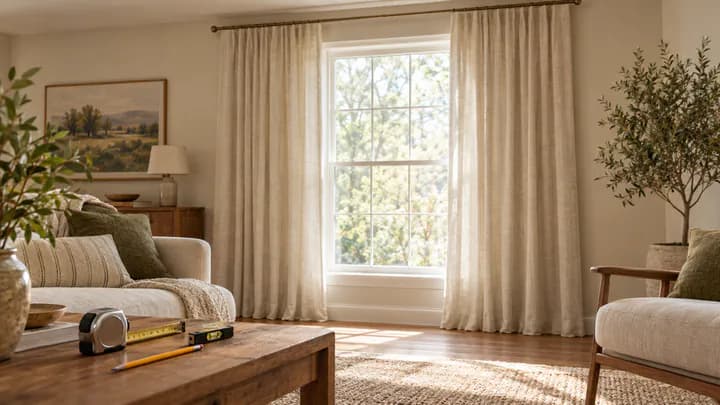
Curtains usually look cheap because of where they hang, not what they cost: the rod sits just above the window frame, stops at the trim, and holds one skimpy panel per side. Raise the rod, extend it past the glass and buy enough fabric, and a ready-made panel can make a living room or bedroom window look taller and wider. This guide compares the height, width, fullness and length options side by side, then turns one 48-inch window's measurements into a shopping list.
It is written for outside-mounted curtains on a rod. If you are fitting blinds or shades inside the window opening, you need a precise inside-mount measurement instead, and most of the advice below will not apply.
Measure the window and the wall around it
You are measuring the wall as much as the window, because the rod lives on the wall. Use a steel tape measure, a pencil, a small level and a step stool, and write every number down in inches (with centimeters if your curtains are sold that way).
- Frame width: outside edge of the trim to outside edge of the trim. If there is no trim, measure the opening.
- Floor to top of trim: measure at the left, center and right. Floors and ceilings are rarely level, and the shortest reading matters later.
- Top of trim to ceiling (or to the bottom of any crown molding): this is your available height.
- Trim to side obstacles: the distance on each side to a corner, another window, a door frame, a light switch or a tall bookcase.
- What sits below the window: a radiator, baseboard heater, vent, outlet or window seat all affect the length you can use.
Note the sill height too, and the bottom edge of the apron (the strip of trim under the sill), if you are considering a short length.
Rod height options compared
The higher the rod, the taller the window reads, because the eye follows the fabric from the rod down to the floor. The usual starting point is at least 4–6 in (10–15 cm) above the frame; going higher adds apparent height, as long as the panel length you can buy reaches the floor.
| Position | Where the rod sits | Effect | Catch |
|---|---|---|---|
| At the frame | 0–2 in above the trim | Window looks its actual size or shorter; fabric may cover the top of the glass | Brackets can land on the trim itself and split it |
| Standard | 4–6 in (10–15 cm) above the trim | Clean, conventional, clears the trim | Does little to add height on a short window |
| Midway | Halfway between trim and ceiling | Noticeably taller window | Often lands between standard panel lengths, so you hem or accept a gap |
| Near the ceiling | 1–3 in below the ceiling or molding | Maximum height; works well in rooms with low ceilings | Needs longer panels, and a gap of wall shows above the glass when curtains are open |
The practical rule is to pick the height after checking panel lengths. Ready-made panels are commonly sold in 63, 84, 95 or 96, 108 and 120 in lengths, and the rod height that suits you is often the one that lets a standard length land where you want it without hemming.
Account for how the panel hangs
The rod is not where the fabric starts. Clip rings and ring-top pinch pleats drop the top of the panel below the rod, often by an inch or two. Grommet and rod-pocket panels sit with a little fabric above the rod. Before you drill, hang one ring on a pencil or dowel and measure from the top of the pencil to where the clip grips the fabric; that drop goes into every height calculation.
How far to extend the rod past each side
Extend the rod 8–12 in (20–30 cm) beyond each side of the frame so that when the curtains are open, the gathered fabric rests on the wall instead of over the glass. That bunched fabric is called the stack, and it is wider than people expect.
| Extension | Where open panels rest | Look | Use it when |
|---|---|---|---|
| 0–4 in | Over the edges of the glass | Narrow window, less daylight | A wall, corner or door leaves no room |
| 8–12 in (20–30 cm) | Mostly on the wall | Window at full width, balanced | Most living room and bedroom windows |
| 12–20 in | Fully on the wall | Window reads wider than it is | Heavy lined panels, or a narrow window you want to widen visually |
Stack size depends on fabric thickness and header style. Pinch pleats and grommets fold into neat, tight stacks; rod-pocket panels bunch wider; blackout linings and velvet add bulk. To check, gather one panel in your hands as tightly as it would sit when open and measure across it.
Two things change the numbers. First, rod length is measured between the brackets, and finials add a few more inches at each end, so check that the finials clear any nearby corner or door trim. Second, long adjustable rods usually need a center support bracket to stop sagging; the rod's packaging will say whether one is included and at what span it is needed. If you have space on only one side, extend that side and keep the other short, and the difference is rarely noticeable once curtains are hung.
Panel fullness: how many panels you really need
Total flat panel width should be 1.5 to 2.5 times the rod width, depending on fabric weight. At 1 times, closed curtains lie flat like a bedsheet; that flatness is the single most common reason ready-made curtains look thin.
| Fabric | Total panel width vs rod width | Why |
|---|---|---|
| Sheer or voile | 2–2.5 times | Light fabric needs many folds to look intentional and give privacy |
| Medium cotton or linen | About 2 times | Soft, even folds without excess bulk |
| Heavy lined, velvet or blackout | 1.5–2 times | The fabric has body; more width makes a stack too thick to clear the glass |
Read labels carefully: some panels are priced and sized per panel, others as a pair, and a "pair, 50 in wide" can mean two 25-in panels or two 50-in panels. Widths around 50–54 in per panel are common. If the curtains are purely decorative and never close, one panel per side is enough, because fullness only shows when the fabric is drawn.
Length options compared: sill, apron, floor-kissing, puddle
Floor length makes a window look tallest; shorter lengths are more practical in some rooms. Floor-kissing curtains stop about 0.5 in (1 cm) above the floor, and puddled curtains add 1–3 in (3–8 cm) that rests on it.
| Length | Where the hem sits | Light blocking | Cleaning ease | Pets and kids |
|---|---|---|---|---|
| Sill | About 0.5 in above the sill | Light spills below the hem | Easiest; nothing near the floor | Out of reach of most pets and small children |
| Apron | Bottom edge of the apron trim | Slightly better than sill | Easy | Mostly out of reach; still a short, casual look |
| Floor-kissing | About 0.5 in (1 cm) above the floor | Good; small gap at the floor | Easy to vacuum under the hem | Reachable, but nothing to trip on |
| Puddle | 1–3 in (3–8 cm) resting on the floor | Best seal at the floor | Collects dust and hair; must be lifted to vacuum | Invites cats to nest and toddlers to pull; a tripping edge |
Sill and apron lengths make sense over a radiator, baseboard heater, window seat or desk, where long fabric would drape over something; keep curtain fabric clear of any heater. For floor-kissing, use the shortest of your three floor readings so the hem does not drag on the high side. Floor-kissing is the safest default in living rooms and bedrooms: it gives most of the height of a puddle without the upkeep.
Worked example: turning measurements into a shopping list
This illustrative window is 48 in (122 cm) wide outside the trim. The top of the trim is 80 in (203 cm) from the floor, and the ceiling is 96 in (244 cm), so there are 16 in (41 cm) of wall above the window. The owner wants the window to look taller and plans to use clip rings with a hypothetical drop of 1.5 in from rod to fabric top.
Step 1: Rod width
At 8 in per side: 48 + (2 × 8) = 64 in (163 cm). At 12 in per side: 48 + (2 × 12) = 72 in (183 cm). With no corner nearby, choose 72 in and buy an adjustable rod whose range covers it comfortably, such as one sold as 48–84 in, so it is not stretched to its weakest extension.
Step 2: Rod height and panel length
Rod height = panel length + floor clearance + ring drop. Working through the options:
- Standard, with 84-in panels: 84 + 0.5 + 1.5 = 86 in. That puts the rod 6 in above the trim (86 − 80), inside the 4–6 in range. No hemming, modest height.
- Near the ceiling, with 95-in panels: rod 2 in below the ceiling at 94 in. The panel needs to be 94 − 1.5 − 0.5 = 92 in, so a 95-in panel is hemmed by 3 in. The rod is 14 in above the trim (94 − 80), and the window reads much taller.
- Midway: 80 + (16 ÷ 2) = 88 in. The panel would need to be 88 − 2 = 86 in, which means hemming 9 in off a 95-in panel or letting an 84-in panel float 2 in off the floor. This is the awkward option here.
For the taller look, go near the ceiling with 95-in panels. Hang them for a day or two before hemming so the fabric relaxes, then mark the hem at your shortest floor reading.
Step 3: Number of panels
With the 72-in rod and standard 50-in (127 cm) panels:
| Fabric | Target width | Panels | Actual fullness |
|---|---|---|---|
| Heavy blackout | 1.5 × 72 = 108 in | 2 (100 in) | About 1.4 times; add a third panel or narrow the rod to 64 in, where 100 in is about 1.6 times |
| Medium linen | 2 × 72 = 144 in | 3 (150 in) | About 2.1 times |
| Sheer | 2.5 × 72 = 180 in | 4 (200 in) | About 2.8 times |
Three panels split unevenly, so hang two on one side and one on the other; on clip rings each panel slides independently, and the closed curtains overlap wherever they meet, so the split is hard to spot. If that bothers you, four panels at 200 in work for medium linen too, just fuller.
The shopping list
- One adjustable rod covering 72 in, with two end brackets and a center support bracket
- Wall anchors rated for the rod and curtain weight, or screws long enough to reach the framing above the window (a stud finder shows where it is)
- Three medium-weight linen panels, 50 × 95 in (127 × 241 cm)
- Clip rings, if the panels lack their own: roughly one every 5–6 in of flat panel width, so 9 or 10 per panel
- Iron-on hem tape and an iron for the 3-in hem, or a tailor's hemming fee
- Tools: drill, level, pencil, tape measure, step stool
If the window sits in a bay, has an arched top or spans most of a wall, standard panels and a single straight rod stop fitting neatly, and that is the point where custom drapery or a specialist track system earns its price.