Honing or Sharpening a Dull Kitchen Knife: When Each Helps
A chef's knife that squashes tomatoes usually has a bent edge, not a worn one. Here's a quick test to tell them apart, how to hone in under a minute, and when a whetstone or other sharpener is worth it.
Drafted with AI. This version has not been reviewed by an editor, so it carries no ads — how we work.
If your chef's knife has started squashing tomatoes instead of slicing them, the edge is most likely bent over, not worn away, and a honing rod can straighten it in under a minute. True sharpening, which grinds off metal to form a new edge, is needed only every few months in most home kitchens. Before you buy a whetstone, run the quick test below to find out which problem you actually have, then match the fix to it.
This guide is for straight-edged Western and general-purpose kitchen knives. It isn't for serrated knives, which need a tapered rod worked one scallop at a time, or for very hard Japanese blades, which can chip on a steel and call for their own stone-by-stone approach.
What happens to an edge as it dulls
A knife edge is two ground faces meeting at a very thin line called the apex. Because that line is so thin, it is flexible. Every time it hits a cutting board, twists through a squash or scrapes across a surface, parts of the apex fold slightly to one side. Under a magnifier you would see a wavy, leaning edge rather than a straight one. This is a rolled edge, and it is the most common reason a knife suddenly feels dull.
A rolled edge still has its metal; it is just pointing the wrong way. Honing pushes it back into line. Over weeks and months, though, the apex also wears away and rounds over, and repeated bending fatigues the thinnest metal until it breaks off. A worn edge has no fine apex left to straighten. Only sharpening, which removes metal from both faces until they meet at a crisp line again, fixes that.
So the two jobs are different: honing realigns, sharpening rebuilds. Honing a worn edge does nothing useful, and sharpening a merely rolled edge grinds away steel you didn't need to lose.
The paper and tomato tests: rolled or worn?
Use a pair of quick checks, hone, and check again. The change (or lack of it) tells you what you're dealing with.
The paper test
Hold a sheet of ordinary printer paper by one top corner so it hangs freely. Place the heel of the knife against the top edge and slice down and toward you in one smooth draw. A sharp edge glides through with a clean, quiet cut. A rolled edge tends to cut in some spots and snag or tear in others. A worn edge folds or crumples the paper along the whole length.
The tomato test
Rest the blade on a ripe tomato with no downward pressure, then draw it gently toward you. A sharp edge bites into the skin almost at once under its own weight. A dull one skates across the surface and only breaks through when you push, flattening the tomato as it goes.
The light check
Hold the knife edge-up under a bright overhead light and look straight down at the edge. A sharp apex is too fine to reflect much. Rolled or rounded spots catch the light as bright glints or a shiny line.
Reading the results
- Run the paper or tomato test and note how the knife behaves.
- Hone the knife with 5 to 10 light strokes per side (method below).
- Repeat the test.
If the knife now cuts cleanly, the edge was rolled and you're done. If it improves only a little, or not at all, the edge is worn and needs sharpening. Bright spots under the light that don't disappear after honing point the same way.
Honing on a steel or ceramic rod, stroke by stroke
The rod that came with your knife block is a honing rod, often called a steel. There are a few types, and they don't all do the same thing:
- Grooved steel rod: the most common. It straightens the edge and removes very little metal. Fine for most mid-hardness Western knives.
- Smooth steel rod: the gentlest option; it realigns without abrading.
- Ceramic rod: realigns and also removes a small amount of metal, so it touches up the edge a little. A good all-round choice if you're buying one.
- Diamond-coated rod: despite the shape, this is a sharpener. It removes metal quickly and shouldn't be used as an everyday hone.
Finding and holding the angle
Most Western chef's knives are ground at around 15 to 20 degrees per side; many older or German-style knives sit near 20, and many newer and Japanese-style ones near 15. You don't need a protractor. Hold the blade straight out at 90 degrees to the rod, halve that to 45, halve again to about 22, then tilt a little lower. That lands you in the right range.
Holding it there for every stroke matters more than the exact number. A steady, slightly-too-shallow angle works better than a wobbling perfect one.
The vertical method
The safest way for beginners is to keep the rod upright and still:
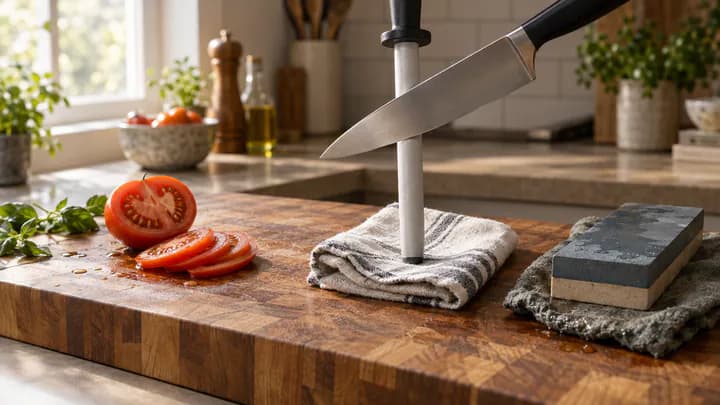
- Stand the rod vertically with its tip on a folded towel on your cutting board, handle in your non-dominant hand.
- Place the heel of the knife (the end nearest the handle) against the top of the rod at your chosen angle.
- Draw the knife down and back toward you in one stroke so the whole edge, heel to tip, crosses the rod by the time you reach the bottom.
- Switch to the other side of the rod and repeat with the other face of the blade.
- Alternate sides for 5 to 10 strokes each.
Use light pressure, roughly the weight of the knife plus a little more. Pressing hard bends the edge rather than straightening it. Speed adds nothing either; slow, even strokes give a straighter edge than the fast clanging seen on cooking shows. Wipe the blade afterward to remove any fine metal particles.
Sharpening options: whetstone, pull-through, electric, professional
When honing no longer brings the knife back, it needs sharpening. Each method trades cost, speed and control differently.
| Method | Rough cost | Speed | Metal removed | Best for |
|---|---|---|---|---|
| Whetstone | About $25–$60 for a combination stone | 10–20 minutes per knife once practiced | Only as much as you choose | Cooks who want the best edge and are willing to practice |
| Pull-through | About $10–$40 | Under a minute | More than needed, especially carbide slots | Inexpensive knives and quick fixes |
| Electric | About $50–$200 | A few minutes | Fairly aggressive on coarse stages | Households with several knives and little time |
| Professional service | Roughly $5–$15 per knife, varying by area | Drop off and collect | Depends on the sharpener | Good knives, chipped edges, or no interest in doing it yourself |
Whetstones and grit
A whetstone is a flat abrasive block, and the grit number describes how coarse it is: lower is coarser. A stone around 1000 grit does the actual sharpening on a dull knife. A finer stone between 3000 and 6000 grit refines and polishes the edge so it cuts more smoothly. Very coarse stones, in the low hundreds, are for repairing chips or reshaping, which most home cooks rarely need. A combination stone with 1000 on one side and something like 4000 or 6000 on the other covers a home kitchen.
Water stones usually need soaking until they stop releasing bubbles, often 10 to 15 minutes; "splash-and-go" stones just need wetting. Check the instructions for yours. Set the stone on a damp towel or holder so it doesn't slide.
The basic sequence: hold your angle, sweep the edge across the 1000 side in strokes that cover heel to tip, and keep going on one face until you can feel a slight rough lip, called a burr, along the whole opposite side when you run a finger gently off the edge (never along it). The burr tells you the two faces now meet. Repeat on the other side, then move to the fine side with lighter strokes, alternating faces, to remove the burr and polish. Finish with a few strokes on your honing rod.
Worked example: setting your angle on a stone
A way to check your angle is by how high the spine sits above the stone. Say your chef's knife is 1.75 inches from edge to spine. At 20 degrees, the spine sits about 0.6 inches up (1.75 × 0.34, the sine of 20 degrees). At 15 degrees, it's about 0.45 inches (1.75 × 0.26). So a gap of roughly half an inch, about the thickness of a stack of a few coins, puts most knives in the right range. Measure your own blade and do the same multiplication.
Stones wear unevenly and develop a dip in the middle. Flatten them every so often with a flattening plate or by rubbing on coarse sandpaper laid on a flat surface, or the dip will round your edge.
Pull-through sharpeners
These are V-shaped slots you draw the knife through. Their appeal is speed and no skill required. The drawbacks: carbide slots scrape rather than grind and take off more metal than a stone would, the fixed angle may not match your knife, and the result can be a ragged edge that dulls again quickly. Ceramic slots are gentler. Used occasionally on an inexpensive knife, a pull-through is a reasonable choice. On a knife you hope to keep for decades, it shortens the blade's life.
Electric sharpeners
Electric models use motor-driven abrasive wheels with angle guides, so they're more consistent than a pull-through and much faster than a stone. The coarse stage removes metal quickly, so use it only when the knife is truly dull and rely on the fine stage for touch-ups. Most can't reach the very heel of a knife with a full bolster, which can leave a small dip there over time.
Professional sharpening
Kitchen shops, some hardware stores and mobile sharpeners at farmers markets will do it for a per-knife fee. It's the sensible route for a chipped or badly neglected edge, or if you simply don't want to learn. Ask whether they use a slow wet grinder or stones; fast dry grinding can overheat thin edges.
How often to hone and how often to sharpen
For a typical home kitchen cooking most evenings, a workable rhythm is to hone weekly, or before any big prep session, and sharpen every few months. The table below adjusts that for how hard the knife works. These are rough starting points, not rules; let the paper and tomato tests decide.
| How you cook | Hone | Sharpen |
|---|---|---|
| A few meals a week, light prep | Every week or two | Every 6 months or so |
| Cook most days | Weekly, plus before heavy use | Every 2–4 months |
| Daily heavy prep, batch cooking | Every session | Every 1–2 months |
The signal to move from honing to sharpening is simple: when 5 to 10 strokes on the rod no longer restore a clean paper cut, the edge is worn. If you find yourself honing every day just to get through a meal, that's the same message.
Cutting boards and habits that keep an edge longer
The surface under your knife does more to its edge than almost anything else. Every cut ends with the apex striking the board, so a hard board bends and chips the edge with each stroke.
- Wood: the kindest choice. End-grain boards, where the fibers face up, let the edge slip between them; edge-grain maple or walnut is also good.
- Plastic (polyethylene) and rubber: soft enough to be gentle on edges, and easy to wash. Replace them when deeply scored.
- Bamboo: harder than most wood boards, so somewhat tougher on edges.
- Glass, marble, granite, slate and ceramic: these will dull a knife quickly. Keep them for serving, not cutting. The same goes for cutting on dinner plates.
A few habits matter almost as much:
- Flip the knife and use the spine to sweep chopped food across the board. Scraping with the edge rolls it sideways.
- Wash by hand and dry straight away. In a dishwasher, knives knock against other items and the edge suffers.
- Store knives in a block, on a magnetic strip or in blade guards, never loose in a drawer where they rattle against metal.
- Keep the chef's knife off bones, frozen food and hard rinds that twist the edge; use a cleaver or a sturdier knife instead.
- Let the knife do the work with a slicing motion rather than pressing straight down, which rolls the edge faster.
Combine a soft board with a quick hone before you start, and most chef's knives will cut cleanly for months between sharpenings.