Your First Batch of Jam in a Boiling-Water Canner
A step-by-step walkthrough for turning a few pounds of strawberries or other berries into pantry-safe jam, covering equipment, tested recipes, headspace, altitude and seal checks.
Drafted with AI and published automatically. Our editors set the standards and fix reported errors — how we work.
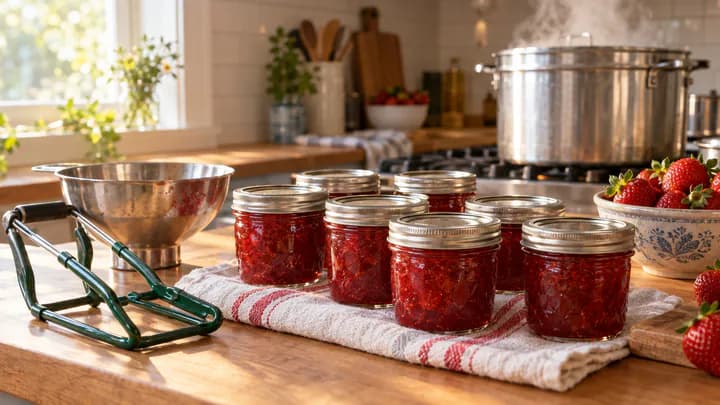
Jam can sit safely in your pantry for months only if two things are true: you used a recipe that has been tested for home canning, and you processed the filled jars in a boiling-water canner exactly as that recipe says. This walkthrough takes one small batch of strawberry or mixed-berry jam from washed fruit to sealed jars. It is written for someone with a few pounds of summer berries who has never used a canner, and it spends the most time on the three places beginners slip: headspace, altitude and checking the seal.
If you only want jam for the fridge or freezer, you can stop after cooking and skip the canner entirely. If you are thinking about canning vegetables, beans, meat or soup, this method is not for you, for the reasons below.
Why jam suits a boiling-water canner and green beans don't
A boiling-water canner heats jars to the temperature of boiling water and no higher. That is enough for high-acid foods such as most fruit jams, where the acidity (plus the sugar) keeps the bacterium that causes botulism, Clostridium botulinum, from growing in the sealed jar. Low-acid foods such as green beans, corn, dried beans, meat and most soups don't have that protection, and they need the higher temperatures that only a pressure canner reaches.
That split is why the method and the food have to match. The National Center for Home Food Preservation's canning guidance publishes separate tested procedures for boiling-water canners and for pressure canners, and the recipe tells you which one it was tested with. A berry jam recipe tested for a water bath is not a template you can swap other ingredients into.
Equipment for a first batch
You don't need much, but a few items are hard to improvise safely. For a small batch of four to six half-pint jars, gather:
- A canner or deep stockpot with a rack. The pot must be tall enough that boiling water covers the jar tops with room to spare and still won't boil over. The rack keeps jars off the hot bottom so they don't crack. A dedicated water-bath canner typically costs roughly $25–$50; a deep stockpot you already own works if it fits a rack and passes the height test.
- Canning jars. Half-pint jars made for home canning. Check every rim for chips by running a finger around it; a nicked rim won't seal.
- Two-piece lids. A flat lid with a sealing compound ring, plus a screw band. Bands can be reused; flat lids are designed for one use.
- A jar lifter. Rubber-gripped tongs shaped to hold a jar upright. Kitchen tongs slip on wet glass.
- A wide-mouth canning funnel to keep jam off the rims.
- A headspace tool or small ruler, plus a plastic bubble remover or thin plastic spatula.
- A wide, heavy pot for cooking the jam, a ladle, a timer, clean cloths and a folded towel for cooling.
Starter kits with the lifter, funnel and headspace tool usually run about $10–$20.
Choosing a tested recipe and pectin type
Use a recipe that was developed and tested for home canning, not one adapted from a blog, a grandparent's card or your own adjustments. Good sources are the center's tested procedures linked above and the recipe insert that comes in a box of commercial pectin, which is written for that specific product. Follow the fruit, sugar, acid and pectin amounts as written.
Matching pectin to the recipe
Pectin is what makes jam set. The main types behave differently and are not interchangeable:
- Regular powdered pectin needs the full amount of sugar the recipe calls for. Cutting the sugar usually leaves you with runny jam.
- Liquid pectin is added at a different stage than powder, so a powder recipe won't work with liquid, or the reverse.
- Low- or no-sugar pectin is formulated to set with less sugar. If you want a less-sweet jam, buy this type and use its own recipe rather than shrinking the sugar in a regular one.
Make one batch at a time. Doubling a jam recipe is a common reason it fails to set, because a larger volume takes longer to reach a full boil and cooks unevenly. If you have more fruit than one batch uses, cook two separate batches.
Before you start: clean hands, fruit and jars
- Wash your hands. The CDC's handwashing guidance says to wet your hands with clean running water, lather the backs, between the fingers and under the nails, and scrub with soap for at least 20 seconds (about two rounds of "Happy Birthday"), then rinse and dry with a clean towel. Do it again after handling anything raw or dirty.
- Prepare the fruit. Rinse berries under running water, drain, then hull strawberries and discard any that are moldy or mushy. One bad berry can spoil the flavor of the batch. Crush or chop as the recipe directs and measure exactly.
- Wash jars, lids and bands in hot, soapy water and rinse well.
- Heat the canner. Set the rack in place, put the jars in, fill with water to cover them and bring it to a simmer. Keeping jars hot until you fill them prevents the glass from cracking when hot jam goes in. Prepare the flat lids as their package directs.
Filling jars and measuring headspace
Headspace is the gap between the top of the jam and the rim of the jar. It matters more than beginners expect. Too little, and jam can bubble out during processing and leave residue on the rim that stops the lid sealing. Too much, and the air left in the jar may not be driven out, so the jar may not seal or the jam on top may darken. Your tested recipe states the headspace; for jams it is a small gap, and you should use the exact figure the recipe gives rather than eyeballing it.
- Cook the jam as the recipe directs, including the full rolling boil (one that doesn't stop when you stir) for the stated time. Skim off foam if you like.
- Lift one hot jar from the canner with the jar lifter, tipping the water back into the pot, and set it on a towel.
- Set the funnel in the jar and ladle in hot jam.
- Measure the headspace with your tool, adding or removing jam until it matches the recipe.
- Slide the bubble remover down the inside of the jar to release trapped air, then recheck the headspace.
- Wipe the rim and threads with a clean, damp cloth. Any sticky residue can block the seal.
- Center a flat lid on the jar and screw on a band until it is just fingertip-tight: snug, but not cranked down. Air has to escape during processing, and an overtightened band can cause lids to buckle.
- Return the jar to the canner and repeat with the rest. Work steadily so the jam stays hot.
Processing time and altitude adjustments
Processing is the timed boil that heats the filled jars through and forces air out so a vacuum seal forms as they cool. Your recipe gives the time, and the clock starts only when the water returns to a full, rolling boil after the last jar goes in.
- Check that water covers the jar tops by the amount your recipe or canner instructions specify. Add boiling water from a kettle if it's low.
- Cover the canner and bring the water to a rolling boil.
- Start the timer. Keep the boil steady for the whole processing time. If the boil stops, bring it back and start the timing over.
Why your elevation changes the time
Water boils at 212°F at sea level but at lower temperatures as you go higher, so jars in a canner at altitude get less heat per minute. Tested recipes compensate by adding processing time above certain elevations, and the tested canning procedures from the National Center for Home Food Preservation come with altitude adjustments for exactly this reason. This is one of the most common beginner mistakes: following the sea-level time in a mountain town. Look up your home's elevation (local government or mapping sites list it), then use the time from the altitude column of your recipe, not the first number you see.
Cooling, checking seals and storing
- When the timer ends, turn off the heat, take off the canner lid and let the jars sit in the water for a few minutes so the boiling settles.
- Lift each jar straight up with the jar lifter, without tilting, and set it upright on a folded towel in a draft-free spot, with space between jars.
- Leave them alone overnight. Don't tighten the bands, press the lids or turn the jars upside down. You may hear a ping as each lid pulls down; that is the vacuum forming.
- The next day, test each seal. Press the center of the lid. If it stays down and doesn't flex or pop back, it's sealed. If it springs up and down, it isn't.
- Remove the bands from sealed jars, wipe off any stickiness and check that the lid stays on firmly by gently lifting the jar by the lid's edge with your fingertips.
- Label each jar with the contents and date. Store sealed jars without bands in a cool, dark, dry place. Once opened, keep the jar in the fridge.
Before opening any stored jar, look at it. A lid that has bulged or come loose, mold, an off smell, or jam that spurts when opened are signs of spoilage. Throw that jar away without tasting it, and don't scrape off mold and eat the rest.
What to do with jars that didn't seal
A jar whose lid flexes the next morning is not shelf-stable, but the jam inside is still good food. You have three choices:
- Refrigerate it and eat it soon. This is the simplest option for one or two jars. Treat it like opened jam.
- Freeze it. Leave room at the top for expansion, or move the jam into a freezer-safe container.
- Reprocess it. Remove the lid, check the rim for chips or residue, clean it, use a new flat lid and process again for the full time. Tested procedures limit how long you can wait before reprocessing, so do it the same day you find the problem and check your recipe's source for its guidance. Reprocessed jam is often softer and darker, so many canners prefer the fridge or freezer.
Working out why it failed
One failed seal in a batch is usually a jar problem: a chipped rim, jam on the rim or a lid that wasn't centered. If most of the batch fails, look at the process instead. Common causes are bands tightened too hard or too loosely, too little headspace so jam boiled out, timing started before the water returned to a full boil, or a sea-level time used at altitude. Fix the cause before the next batch rather than adding extra minutes on your own guess.
When the jars sealed but the jam is runny
A good seal and a good set are separate problems. Soft jam is safe if it was canned by a tested process; it just pours like syrup. It often firms up over a week or two on the shelf. If it doesn't, use it as a topping for yogurt or pancakes, or remake it following the instructions that come with your pectin for fixing jam that didn't set, which will include reprocessing in clean jars with new lids.