Seasoning and Caring for Cast Iron Without Sticky Spots
Sticky, blotchy or rusty cast iron nearly always comes from too much oil or too little heat. Here is a care schedule built on thin coats, high heat and fast drying, plus fixes for gummy and rusted pans.
Drafted with AI. This version has not been reviewed by an editor, so it carries no ads — how we work.
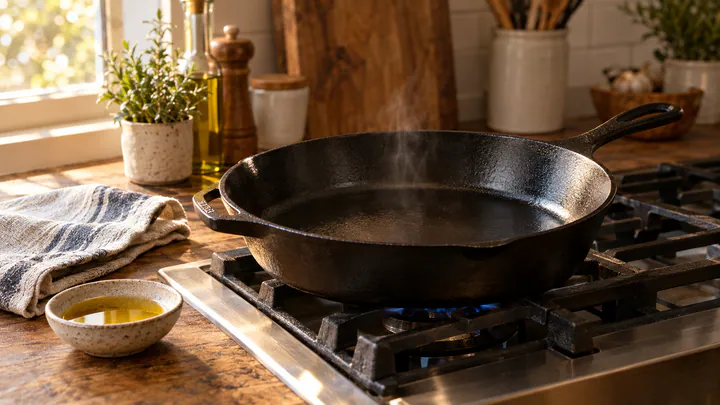
A sticky, blotchy or rusty cast iron skillet almost always has one of two problems: too much oil was left on it, or it never got hot enough to turn that oil into a hard coating. Fix those two habits and the rest is a short routine: wash (mild soap is fine), dry the pan on a burner, wipe on a film of oil so thin the pan looks nearly dry, and give it an oven re-season every few months. This guide sets that out as a schedule you can follow with an inherited pan or a new one.
One exclusion up front: enameled cast iron, such as most Dutch ovens with a glossy colored or cream interior, is not seasoned this way. The enamel is already a finished surface, and baking oil onto it only leaves a brown residue. Carbon steel pans and woks work on the same principle as bare cast iron, but they are thinner and heat differently, so their details vary.
What seasoning actually is
Seasoning is oil that has been heated past its smoking point until it polymerizes: the fat molecules link up into a hard, slick, plastic-like layer bonded to the iron. It is not a coat of grease sitting on the surface. A good layer feels dry and smooth to the touch and looks evenly dark, from satin to glossy.
That explains the common failures:
- Sticky or tacky: too much oil, or not enough heat. The excess stays half-cured, like varnish that never dried.
- Blotchy or brown patches: oil pooled in some spots and burned thin in others, or food has worn through in high-use areas.
- Rust: water sat on bare or thinly seasoned iron. Iron rusts quickly when it stays wet.
Most neutral cooking oils and vegetable shortening season well. Flaxseed oil has a reputation for a very hard finish, but many cooks find it can flake, and the evidence on which oil is best is mostly anecdotal. Use what you cook with; technique matters far more than the bottle.
The care schedule at a glance
| Task | When | Time it takes | Sign you need it |
|---|---|---|---|
| Clean, dry on the burner, thin oil wipe | After every use | About 3–5 minutes | Always |
| Stovetop touch-up | Weekly if you cook often, or as needed | About 10 minutes | Dull or grayish spots, food starting to catch |
| Oven re-season | Every few months | About 1 hour baking plus cooling | Patchy color, a worn cooking area, after fixing rust |
| Sticky-surface fix | As needed | About 1 hour | Tacky feel, dust or lint clinging to the pan |
| Rust removal and rebuild | Rarely | An afternoon | Orange spots or a rusted rim or base |
After every use: clean, dry, oil
This is the habit that does most of the work, and it takes a few minutes.
- Clean while the pan is warm. Scrape out food with a flat wooden or plastic scraper. Wash with hot water, a sponge or brush, and a small squirt of dish soap if the pan is greasy. For stuck bits, a chain mail scrubber or a paste of about 2 tablespoons of coarse salt and a little water works without harming the seasoning.
- Rinse and towel off. Don't leave it soaking in the sink or put it in the dishwasher; long soaks and dishwasher cycles are what strip seasoning and cause rust.
- Dry on a burner. Set the pan over medium heat for a minute or two until every trace of moisture is gone. Towels miss water in the pores of the iron, and that hidden water is where rust starts.
- Oil very thinly. While it is still warm, add roughly half a teaspoon of oil to a 10-inch skillet and rub it over the inside with a paper towel. Then take a clean paper towel and wipe again as if you were trying to remove it all. The pan should look almost dry, with only a faint sheen.
- Let it cool and store it dry. Keep it somewhere with air around it. If you stack pans, put a paper towel between them, and don't store it with a lid sealed on, which can trap humidity.
Can you use soap on cast iron?
Yes. Ordinary dish soap is a mild detergent and does not dissolve polymerized seasoning, which is a hardened coating rather than loose grease. The old warning dates from soaps made with lye, which could attack the finish. What does damage seasoning is soaking, harsh scouring with steel wool during routine cleaning, and the dishwasher.
Weekly or as needed: a stovetop touch-up
If you cook with the pan several times a week, or notice dull gray patches where food has started to catch, a stovetop touch-up adds a fresh thin layer without heating the oven.
- Clean and dry the pan on the burner as above.
- Raise the heat to medium-high and let the pan heat for a few minutes.
- Wipe on a thin film of oil with a folded paper towel held in tongs, then wipe away the excess.
- Keep heating until the oil starts to smoke lightly, then give it about 5 more minutes so the film cures fully.
- Turn off the heat and let the pan cool on the burner.
Turn on the range hood or open a window, since the oil will smoke. And don't skip the extra minutes once smoke appears: stopping early is exactly how a pan ends up tacky.
Every few months: an oven re-season
The oven heats the whole pan evenly, including the handle, sides and base, so it builds a more uniform layer than the stovetop. Do this every few months, after fixing rust, or whenever the color looks patchy.
- Wash, rinse and dry the pan on a burner.
- Heat the oven to roughly 450–500°F (230–260°C). Use the higher end only if your oven and kitchen ventilation handle it comfortably.
- Rub about a teaspoon of oil over every surface, inside and out, including the handle. Then wipe it off with a clean towel until the pan looks nearly dry.
- Put a sheet of foil or a baking sheet on the lower rack to catch any drips, and place the pan upside down on the rack above. Upside down lets any excess drain off instead of pooling.
- Bake for about an hour.
- Turn off the oven and leave the pan inside until it cools completely. Cooling slowly helps the layer set and avoids handling a very hot pan.
One coat a session is enough for maintenance. Several thin coats always beat one thick one: thick coats are what create sticky spots and drips that harden into bumps.
Fixing a sticky or gummy surface
A tacky pan has oil that never finished curing, and the cure is usually more heat, not more oil.
- Bake it as it is. Put the pan upside down in a 450–500°F (230–260°C) oven for about an hour with no added oil, then cool it in the oven. Often this is enough to finish the polymerizing.
- If it is still tacky, scrub the sticky areas with coarse salt and a little hot water, or a chain mail scrubber, to remove the soft layer. Rinse, dry on a burner, then do one very thin oven coat.
- If there are thick, gummy ridges or drips, scrub them down with steel wool until the surface is smooth, then rebuild as in the rust section below.
To avoid a repeat, judge the amount of oil by what is left after wiping, not what goes on. If you can see streaks or feel slickness on your fingertip, there is still too much.
Removing rust and starting over
Surface rust looks alarming but is usually shallow, and a rusty inherited pan can almost always be brought back. Pitting deep enough to feel, or a crack, is a different matter; a cracked pan should be retired.
- Scrub the rust off. Use steel wool or a coarse scouring pad with a little water and dish soap, working until you reach gray or dark metal. It is fine to scrub hard here; you are deliberately removing damaged seasoning.
- Rinse and dry with heat right away. Bare iron can flash-rust within minutes, so towel it off and set it on a burner over medium heat for a few minutes until completely dry.
- Oil thinly while warm. Coat every surface, then wipe it back until it looks almost dry.
- Do 2–3 oven rounds. Bake upside down at 450–500°F (230–260°C) for about an hour, let it cool, and repeat the thin coat and bake two or three times. Each round adds a hard layer.
For a pan caked with decades of crusty, flaking buildup, many restorers strip it with a lye-based oven cleaner before rebuilding. If you go that route, follow the product label's directions and protective-gear warnings closely, wash the pan thoroughly afterward, and then follow the same rust-free rebuild above.
Bare and lightly rebuilt iron also shouldn't go from very hot to cold water in one move. A sudden temperature swing can warp or crack the pan, so let it cool somewhat before rinsing.
Foods to go easy on while the seasoning is young
A freshly rebuilt or new pan has only a few thin layers, and some cooking wears them faster than others. The best way to build seasoning is simply to cook with fat: frying eggs in butter, searing meat, roasting potatoes, cooking bacon, sautéing onions. Each session adds a little.
For the first several weeks, go easy on:
- Long simmers of acidic foods. Tomato sauce, chili, wine braises and vinegar-based dishes left in the pan for an hour or more can eat into a young layer and give the food a metallic taste. A quick deglaze with a splash of wine is fine; a two-hour ragù is better in a stainless or enameled pot until the seasoning matures.
- Storing food in the pan. Leftovers sitting overnight hold moisture against the iron. Move them to a container.
- Delicate, sticky foods. Eggs and pancakes will stick more until the surface is well built. Use a bit more fat than you think you need, and preheat the pan properly first.
- Boiling water for long periods. Pasta water or long steaming can soften thin seasoning. Brief contact during cleaning is no problem.
Once the pan has a deep, even, dark finish, it handles all of these much better, and an occasional acidic dish is fine as long as you clean, dry on the burner and oil it thinly afterward. If a spot ever looks dull or a patch of rust appears, it is a sign to move one step up the schedule, not a ruined pan.