Candle Making at Home: A Beginner's Guide to Better Burns
Candle making at home is easy to start and easy to get wrong. Here is what actually matters: matching wick to container, pouring at the right temperature, respecting fragrance flash points, and curing long enough for the scent to bloom.
Rewritten with AI and republished automatically. Our editors set the standards and fix reported errors — how we work.
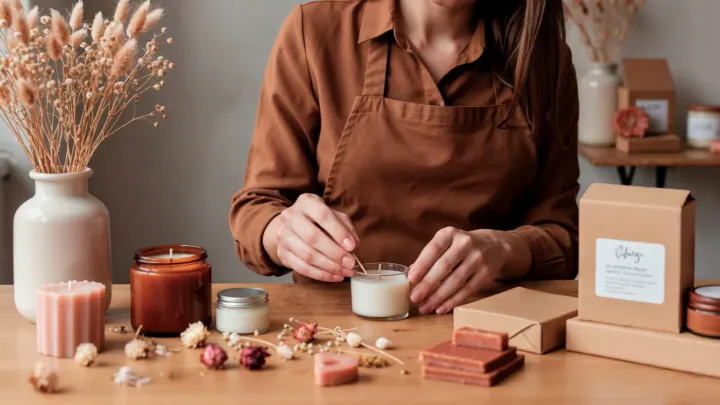
TL;DR: Candle making at home needs wax, a correctly sized wick, a heat-safe vessel, and fragrance added at the right temperature. Most beginner failures come from three things: a wick too small for the container, too much fragrance oil, and burning the candle before it cures. Fix those and the rest is decoration.
Candle making at home is a small-batch craft in which melted wax, a fragrance or dye, and a wick are combined in a heat-safe container to make a burnable candle. It is genuinely beginner-friendly, but it is also a craft with physics attached — wax, flame, and airflow have opinions, and they will overrule your aesthetic choices. This guide covers the decisions that actually change the outcome.
What supplies do you need to start making candles at home?
You need five things: wax, wicks, a heat-safe container, a pouring pitcher you can melt wax in, and a thermometer. Everything else — dye, labels, wick stickers, a heat gun — is optional refinement.
- Wax: start with a container-grade soy or soy-coconut blend. Pillar wax will not work well in a jar.
- Wicks: buy a sample pack across two or three sizes rather than committing to one.
- Containers: canning jars, candle tins, or purpose-made vessels. Straight-sided is far more forgiving than curved.
- A pouring pitcher and a pot of water for a double-boiler setup, plus a digital thermometer.
- A kitchen scale. Fragrance is measured by weight, not by capfuls. This is not optional if you want consistency.
Cover your work surface with parchment or cardboard and give yourself more room than you think you need. Hot wax spreads.
Which wax should you choose — soy, beeswax, paraffin, or coconut blend?
For a first batch, choose a container-grade soy or soy-coconut blend. Soy is forgiving, widely available, and holds fragrance well. Beeswax smells lovely on its own but resists added fragrance and needs a larger wick. Paraffin throws scent best but has the weakest environmental story.
| Wax | Typical pour temp | Scent throw | Difficulty | Best for |
|---|---|---|---|---|
| Soy (container grade) | ~130-140°F | Good, improves with cure | Easy | First batches, gifts |
| Soy-coconut blend | ~125-135°F | Very good | Easy-moderate | Smooth tops, strong scent |
| Beeswax | ~155-165°F | Faint honey note; resists added fragrance | Moderate | Unscented, natural look |
| Paraffin (container grade) | ~150-160°F | Strongest | Easy | Maximum fragrance projection |
| Palm / specialty | Varies widely | Moderate | Harder | Crystalline surface effects |
Always follow the temperature range on your specific wax's technical sheet. Manufacturers formulate waxes differently, and the numbers above are orientation, not gospel.
How do you pick the right wick size?
Match the wick to the container's diameter first, then adjust after a test burn. A correctly sized wick produces a full melt pool roughly a quarter-inch deep after about one hour of burning per inch of container width, with a flame around a half-inch tall and no visible soot.
Wick series have names — CD, ECO, LX, HTP, CDN — and each behaves differently with each wax. Manufacturer charts give you a starting point based on jar diameter and wax type. Treat that chart as a hypothesis, not an answer.
Two signs to read on a test burn:
- Too small: wax ledges left on the glass, a shrinking flame, tunneling, guttering out.
- Too large: mushrooming carbon on the wick tip, black soot on the glass, a tall dancing flame, a container that gets uncomfortably hot to touch.
Here is the decision rule we use: if the melt pool has not reached the edge after burning one hour per inch of diameter, size up one wick. If the glass sooted within the first hour, size down. Change one variable per test batch, or you will learn nothing.
How much fragrance can you add — and do essential oils work?
Most container waxes accept 6 to 10 percent fragrance by weight, which works out to roughly 1 to 1.6 ounces per pound of wax. More is not better. Excess oil pools at the bottom, seeps through the top, drowns the wick, and can create an unstable flame.
Two details beginners rarely hear. First, flash point matters. Fragrance oils have a temperature above which the aromatics begin volatilizing off. Add fragrance around 180-185°F for soy — hot enough to bind, well within range for most oils — and stir for a full two minutes. Undermixing is why some candles smell strong at the top and like nothing halfway down.
Second, essential oils are not drop-in replacements. Many are too volatile to survive a flame, so they smell wonderful in the jar and disappear when lit. Lavender, eucalyptus, cedarwood, litsea cubeba, and patchouli hold up reasonably well. Citrus oils largely do not, and they cost a fortune per pound. This is a case where the natural option is genuinely worse at the job.
Blends worth trying: lavender with eucalyptus for an evening wind-down, orange with clove and a touch of cinnamon for cold months, cedarwood with vanilla for something warm and unfussy. Candles set a mood, but they do not replace a consistent schedule.
How do you pour a container candle, step by step?
Melt, add, pour, cure. The sequence is simple; the temperatures are what separate a smooth candle from a lumpy one.
- Weigh your wax. A rough rule: fill your empty container with water, weigh it, and use about 80 percent of that number in wax ounces.
- Secure the wick with a wick sticker or a dab of melted wax, centered, and hold it upright with a clothespin or wick bar.
- Melt the wax in a pitcher set in simmering water. Never melt wax over direct high heat and never walk away from it.
- Heat to roughly 185°F, remove from heat, add dye, then add fragrance by weight and stir slowly for two minutes.
- Let it cool to your wax's pour temperature — around 135°F for most soy. Pouring too hot causes frosting and sinkholes; too cool causes lumps and wet spots.
- Pour slowly down the side, leaving about half an inch of headspace.
- Leave it alone for at least four hours at room temperature. Do not move it. Do not refrigerate it. Cooling shock is the enemy of a flat top.
- Cure — 1 to 2 weeks for soy, 24 to 48 hours for paraffin and beeswax — then trim the wick to a quarter inch before the first burn.
Why does my candle tunnel, frost, or sink in the middle?
These are three separate problems with three separate causes. Tunneling is a wick-size or first-burn issue. Frosting is a cosmetic crystallization quirk of natural waxes. Sinkholes are a cooling-rate issue.
- Tunneling: the wick is undersized, or the first burn was ended before the melt pool reached the glass. Wax remembers its first burn. To rescue an existing candle, wrap foil loosely over the top with an opening for the flame and burn for an hour or two to reflow the ledge.
- Frosting: white crystalline patches on soy. Harmless, purely cosmetic, and nearly unavoidable with pure soy. Pouring slightly cooler, warming jars beforehand, and using a coconut blend all reduce it.
- Sinkholes and craters: the wax contracted unevenly while cooling. Save about 10 percent of your batch for a second top-off pour, or pass a heat gun briefly over the surface to re-level it.
- Wet spots: those ghostly patches where wax pulls away from the glass. Cosmetic only. Warm your containers to about 100°F before pouring to reduce them.
The costly mistake we see most
Using the wrong vessel. Thrifted drinking glasses, thin votive holders, and decorative ceramics with unknown glazes are not built for sustained heat and can crack or shatter with a full melt pool. Canning jars are tempered and generally fine; a wine glass is not. If you cannot verify a container is heat-safe, do not put a flame in it.
How much does candle making at home cost in 2026?
Expect $30 to $70 for a starter setup and roughly $4 to $8 in materials per 8-ounce container candle. Vessels and fragrance oil drive most of that variance — wax itself is the cheap part.
Buying a 10-pound slab of wax instead of 2-pound retail bags typically cuts your per-candle wax cost substantially, and fragrance bought at 4 or 8 ounces costs far less per ounce than 1-ounce sample bottles. The trap is buying twelve fragrances you will use once. Start with three you know you like.
If you plan to sell, price for materials plus your time, breakage, testing batches, and packaging. Many first-time sellers price at material cost and quietly lose money. None of this is financial advice — just household arithmetic.
Is candle making actually good for stress?
Many people find it genuinely calming, and the reasons are unglamorous: it is a task with a clear beginning and end, it occupies your hands, it requires enough attention to crowd out rumination, and it produces a physical object. Research on absorbing manual hobbies generally supports the idea that focused, repetitive craft work helps people downshift.
What it is not: a treatment for anxiety, insomnia, or any medical condition. Scented candles can support a relaxing environment; they do not medicate anyone. If low mood, persistent anxiety, or sleep problems are affecting your daily life, please consult a qualified health professional.
The practical version of the benefit is that candle making forces a phone-free hour. If that appeals, it pairs well with the approach in our digital declutter guide — a craft that punishes distraction is a surprisingly effective attention trainer.
What safety rules matter most — and what changes if you sell?
Three rules cover most of the risk: never leave melting wax or a lit candle unattended, keep flames at least 12 inches from anything flammable and away from drafts, and never add water to hot wax. A wax fire is a grease fire — smother it, do not douse it.
Additional practice worth adopting:
- Trim wicks to a quarter inch before every burn to cut soot and flame height.
- Stop burning when about half an inch of wax remains, so the container base never overheats.
- Limit any single burn session to about four hours.
- Keep pets, loose sleeves, curtains, and children clear of the pouring station.
Selling changes the picture. Candles sold in the US are expected to carry fire-safety warning labeling consistent with the ASTM F2058 standard, covering supervision, wick trimming, and clearance instructions. Local business rules and product liability considerations vary, so check your jurisdiction before taking money. And test-burn every new wax, wick, and vessel combination yourself first — a combination that works in an 8-ounce jar may soot badly in a 12-ounce one.
How do you turn homemade candles into good gifts?
The gift-worthiness gap is almost entirely about the top surface and the label. A flat, unblemished top and a clean handwritten or printed label reads as intentional; a cratered top with a crooked wick reads as unfinished.
- Top off with a second pour or a quick pass of a heat gun.
- Label with the scent name, pour date, and burn instructions. The date matters — it tells the recipient it is cured.
- Package in a recyclable box with the lid separate so the fragrance does not transfer to the packaging.
- Consider a matched set of three small candles instead of one large one. Smaller vessels cure faster and are more wick-forgiving.
For styling at home, low clusters read better than a single tall candle: group odd numbers at varying heights, keep them off bookshelves with paper or dried foliage nearby, and reserve the strongest scents for larger rooms. A heavily fragranced candle in a small bathroom becomes overwhelming fast.
Key takeaways
- Start with container-grade soy, a straight-sided heat-safe jar, and a sample pack of wicks — then test-burn before making a full batch.
- Size the wick to the container: a full melt pool after roughly one hour per inch of diameter, with no soot, is the target.
- Keep fragrance at 6-10 percent by weight, add it around 180-185°F, and stir for two full minutes.
- Cure soy candles 1-2 weeks. Most "my candle has no scent" complaints are impatience, not a bad recipe.
- Frosting and wet spots are cosmetic; tunneling and sooting are not — those mean a wick change.
- Never leave melting wax or a burning candle unattended, and never use a vessel you cannot confirm is heat-safe.
Frequently asked questions
How long do homemade candles need to cure before burning?
Soy and soy-blend candles should cure 1 to 2 weeks before burning, while paraffin and beeswax are usually fine after 24 to 48 hours. Curing lets the fragrance oil bind fully with the wax, which noticeably improves scent throw. Burning a soy candle the next day is the most common reason beginners think their candle 'has no smell.'
How much fragrance oil should I add per pound of wax?
Most container waxes hold 6 to 10 percent fragrance by weight, which is roughly 1 to 1.6 ounces per pound of wax. Always check the maximum load your specific wax supports. Overloading causes oil to seep out, wicks to drown, and flames to behave unpredictably.
Can I use essential oils instead of fragrance oils in candles?
You can, but essential oils often perform poorly in candles because many have low flash points and evaporate during melting and burning. Sturdier options like lavender, eucalyptus, cedarwood, and litsea cubeba hold up best, and you should add them at a lower temperature than fragrance oils. Expect a softer, shorter-lived scent and a higher cost per candle.
Why does my candle tunnel down the middle?
Tunneling almost always means the wick is too small for the container's diameter, or the first burn was cut short. Let every candle burn until the melt pool reaches the edges — about one hour per inch of container width — because wax remembers its first burn. A too-small wick will tunnel no matter how patiently you burn it, so size up on your next batch.
Are mason jars safe for candles?
Standard canning jars are generally safe because they are tempered for heat, but thin drinking glasses, ceramics with unknown glazes, and decorative vessels with sharp internal angles are not. Any container you use should be heat-safe, thick-walled, straight-sided where possible, and free of cracks. When in doubt, use vessels sold specifically for candle making.
How much does it cost to make a candle at home?
A starter setup typically runs $30 to $70, and after that a standard 8-ounce container candle costs roughly $4 to $8 in materials, depending on the vessel and fragrance. Vessels and fragrance oil are the two biggest variables. Buying wax in 10-pound slabs rather than 2-pound bags is the single easiest way to lower per-candle cost.
Do I need special labeling if I sell my candles?
Yes — candles sold to the public in the US are expected to carry fire-safety warning labeling consistent with ASTM F2058, covering burn instructions, wick trimming, and supervision. Requirements vary by jurisdiction and business type, so check local rules and consider liability insurance before selling. Test-burn every new wax, wick, and vessel combination before it reaches a customer.