How to Juggle Three Balls, From First Toss to Steady Cascade
Most failed attempts at juggling come from rushing to three balls. Get one clean arc, then a reliable two-ball exchange, and a steady three-ball cascade follows from short daily practice.
Drafted with AI. This version has not been reviewed by an editor, so it carries no ads — how we work.
The quickest way to juggle three balls is to spend your first few sessions juggling one and two. Most people who give up never had a repeatable single throw, so the third ball turns every attempt into a scramble across the floor. If you build a consistent eye-level arc, then a calm two-ball exchange, a steady three-ball cascade usually follows within a few weeks of 10-minute daily practice. This walkthrough is for adults and teenagers who have tried before and kept chasing balls; it covers the standard three-ball pattern only, not clubs or rings.
Balls that stay where they land
Use beanbag-style balls, not tennis balls or anything that bounces. A beanbag that hits the floor stays put, which saves a surprising share of your practice time, and its soft shell settles into your palm instead of rolling off your fingers.
Look for balls about 60 to 70 mm across (roughly 2.4 to 2.75 inches), which fits most adult hands. A ball in that range sits in the palm with room for your fingers to close around it. Larger hands can go to the top of the range; smaller hands and younger teens often do better at the bottom. A set of three plain beanbag juggling balls typically costs roughly $10 to $20.
Making your own from rice and balloons or socks
Homemade balls work fine for learning, and they cost close to nothing.
- Balloon and rice: Fill a small plastic bag or a funnel with roughly half to two-thirds of a cup of uncooked rice, and work it into a stretched balloon. Cut the neck off a second balloon and pull it over the open end so the rice is sealed in. A third balloon over the top makes the ball sturdier and less likely to split.
- Sock and rice: Pour a similar amount of rice or dried lentils into the toe of an ankle sock or a child's sock, twist the sock tight just above the filling, then fold the rest of the sock back over the ball and tie or stitch it closed.
Make all three the same size and weight. A heavier or bigger ball throws differently, and your hands will spend their effort adjusting instead of learning. Keep rice-filled balls dry.
Where to stand so you stop chasing
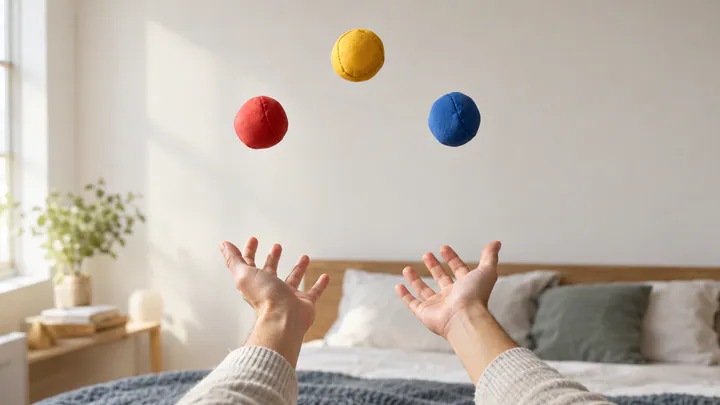
Practice either facing a wall or standing over a bed. Facing a plain wall from about a forearm's length away stops throws drifting forward, since a ball thrown too far out simply taps the wall and tells you so. Standing with your knees against the side of a bed means drops land on the mattress at waist height, so you pick them up without bending over 200 times a session.
Either setup also cures the most common beginner habit, walking forward to save bad throws, before it starts.
Step 1: One ball, one eye-level arc
Every throw in the cascade is the same throw, so learn it on its own first.
- Stand with your elbows loosely at your sides and your forearms roughly level with the floor, hands at about waist height, palms up.
- Throw the ball from one hand so it rises in an arc and peaks at about eye level or slightly above, then falls into the other hand. The motion comes from the forearm and wrist, not the shoulder.
- Release the ball slightly toward the center of your body and catch it slightly to the outside. The hand makes a small scooping loop, moving in to throw and out to catch.
- Throw it back the same way. Keep your eyes on the top of the arc, not on your hands.
You are ready to move on when the ball lands in the catching hand without that hand having to reach, and both directions look alike. Many people find their weaker hand throws lower or wider; spend a little extra time on it now rather than later.
Step 2: The two-ball exchange, and why you throw before you catch
The exchange is the heart of juggling: two balls cross in the air, and each hand throws before it catches. Hold one ball in each hand.
- Throw the ball in your dominant hand on the same eye-level arc.
- When that ball reaches its peak, throw the second ball from your other hand. It goes up on the inside, passing under the first ball.
- Catch the first ball in your non-dominant hand, then the second in your dominant hand.
The rhythm is throw, throw, catch, catch. Saying it out loud helps. The second throw must go up as the first ball peaks because the catching hand needs to be empty before the first ball arrives. If you wait until you have caught the first ball, you end up handing the second one across, which is a different pattern and will not grow into three balls.
Once it works starting from your dominant hand, practice starting from the other hand too. The cascade alternates hands, so you need both versions. Aim for 10 clean exchanges in a row from each side before adding the third ball.
Step 3: The three-ball flash
A flash is three throws and three catches, then stop. It is the bridge from two balls to juggling, and it is the first moment all three balls are in the air together.
- Hold two balls in your dominant hand: one resting at your fingertips toward the front, the other farther back in the palm. Hold the third ball in your other hand.
- Throw the front ball from your dominant hand on the usual eye-level arc.
- When it peaks, throw the ball from your other hand, crossing under it.
- When that second ball peaks, throw the remaining ball from your dominant hand.
- Catch all three, then stop. You should end with two balls in your non-dominant hand and one in your dominant hand.
It is just a two-ball exchange with one extra throw on the end, keyed to the same signal: throw when the incoming ball peaks. Expect plenty of flashes where the third throw goes wild or you freeze and never release it. Both are normal. The freeze usually means you are waiting to catch before throwing, so go back to saying the rhythm out loud.
Step 4: From flash to a running cascade
Extend the flash one throw at a time instead of trying to keep going indefinitely. After a clean flash, try four throws, then five, then six. Each time a ball reaches the top of its arc, the hand underneath the next ball throws.
Count your catches out loud and stop on purpose a throw or two before you expect to lose it. Ending under control trains the pattern; ending in a pile of dropped balls trains panic. When you can reliably reach a number, set the next target a few catches higher.
Somewhere past 20 catches, the cascade usually starts to feel self-correcting: a slightly off throw gets fixed by the next one instead of ending the run. That is the steady cascade you are after.
Common faults and how to fix them
Walking forward
If you keep stepping forward to save balls, your throws are traveling away from you. Go back to the wall, stand a forearm's length away and juggle without touching it. Thinking of the throws as rising straight up and across, rather than up and out, helps.
Throws too high
High throws feel like they buy time, but they get erratic and wreck the timing, because the next throw is keyed to a peak that keeps moving. Bring every throw back to eye level or just above. If one ball goes high, let it drop and restart rather than adjusting the others to match.
Hands creeping up
As runs get longer, many people start catching higher and higher, which shortens the time each ball spends falling and speeds everything up until it collapses. Keep your elbows near your sides and your catching hands at waist height, and let the ball come down to you.
Throwing two balls at once
If both hands fire together, you are reacting to the catch instead of the peak. Slow down, go back to two-ball exchanges and say "throw, throw, catch, catch" with a clear gap between the two throws.
A two-week, 10-minute-a-day practice plan
Ten focused minutes a day tends to beat a long weekend session, because short practice keeps your throws careful and your arms fresh. Treat the plan below as a sequence, not a deadline: move on when you hit the goal, and repeat a day when you don't.
| Days | Focus | Goal before moving on |
|---|---|---|
| 1–2 | One ball, hand to hand | Consistent eye-level arcs both ways, no reaching |
| 3–5 | Two-ball exchange from each hand | 10 clean exchanges in a row from each side |
| 6–8 | Three-ball flash, plus 2 minutes of exchanges to warm up | A clean flash most of the time |
| 9–11 | Extending the flash, counting catches | 10 catches, then 20 |
| 12–14 | Longer runs, fixing faults at the wall | Working toward 50 catches |
If you stall at one stage for several days, the cause is almost always the stage before it. A shaky flash usually means uneven two-ball exchanges; a cascade that dies at eight catches usually means one hand throws lower than the other.
Ten minutes of juggling also makes a good stand-up break during a long day at a desk, alongside the kind of movement breaks that help with a stiff neck from desk work.
Milestone checklist
- 10 clean two-ball exchanges in a row, starting from either hand
- A clean three-ball flash
- 10 consecutive catches
- 20 consecutive catches
- 50 consecutive catches
Fifty catches is a sensible point to call the cascade learned. From there, the usual next steps are juggling while turning, throwing one ball higher than the rest, or starting and stopping smoothly from either hand.
Who should try something else
Juggling means hundreds of small repeated throws per session, mostly from the forearm and wrist with the arms held up. If you have a shoulder or wrist injury that makes repeated throwing uncomfortable, this is not the hobby to push through, and a doctor or physical therapist can tell you whether it suits your situation. Stop any session where throwing causes pain rather than ordinary tiredness.
And if your goal is clubs or rings, the one-ball arc and exchange timing carry over, but grip, spin and throw technique differ enough that you will want instruction specific to those props.