Why an Interior Door Sticks or Won't Latch, and How to Fix It
Most sticking or non-latching interior doors come down to a loose top hinge, seasonal swelling or a misaligned strike plate. Here is how to tell which one you have and fix it with a screwdriver before you reach for a plane.
Drafted with AI. This version has not been reviewed by an editor, so it carries no ads — how we work.
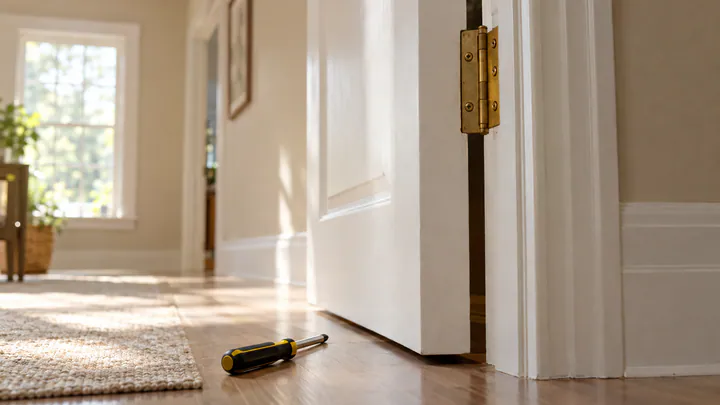
Most interior doors that rub, stick or refuse to click shut have one of three problems: a loose top hinge that lets the door sag, wood that has swollen in humid weather, or a strike plate that no longer lines up with the latch. Each one shows itself with a quick test, and each has a fix that costs little more than a few minutes with a screwdriver. Work through them in that order, because planing wood off a door is permanent and is only the right answer once the cheaper fixes have failed.
This guide is for an ordinary interior door: bedroom, bathroom, closet. It is not for exterior doors with weatherstripping or security locks, and it is not for a door whose frame is visibly out of square because the house has moved. Those need a carpenter.
Read the gap: where the door rubs tells you why
A well-hung door has an even gap around its top and both sides, roughly the thickness of a coin. Close the door and look at that gap from the side you can see the hinges on. Where it pinches to nothing and where it opens up wide tells you more than any amount of pushing and pulling.
Two quick checks help. First, slide a strip of paper or a dollar bill into the gap at several points and close the door on it; wherever the paper drags hard or tears, the door is tight. Second, look for scuffed or shiny paint on the door edge or the jamb, which marks where the two have been rubbing.
| What you see | Likely cause | Try first |
|---|---|---|
| Rubs at the top corner on the latch side; gap widens at the top on the hinge side | Loose top hinge, door sagging | Tighten or lengthen the top hinge screws |
| Tight along the whole edge or all the way around, mostly in summer | Seasonal swelling | Lower indoor humidity, seal bare edges |
| Swings freely but won't stay shut, or only latches when slammed | Strike plate misaligned with the latch | Mark the latch and adjust or file the strike |
| Door springs back open from the hinge side | Hinge-bound: hinges set too deep or thick paint buildup | Check the hinge recesses and scrape paint from the hinge-side gap |
| Rubs only at the bottom on a rug or threshold | Floor covering too thick, or bottom hinge loose | Tighten the bottom hinge; trim the door bottom if the floor has changed |
One more test isolates a loose hinge. Open the door partway, grip it by the latch edge and lift gently. If the top hinge shifts, clicks, or you can see the hinge leaf pull away from the jamb, the screws have lost their grip.
Signs it's beyond a screwdriver
Stop and call a carpenter if the gap tapers sharply from one corner to another, if there are fresh diagonal cracks in the drywall running up from the top corners of the frame, if the floor near the door now slopes, or if several doors in the house started sticking at once. Those point to the frame itself moving, and adjusting the door will only hide the symptom for a while.
Tighten or lengthen the top hinge screws
A sagging door is the most common cause of rubbing at the top latch corner and a latch that has dropped below its strike. The top hinge carries most of the door's weight as it tries to pull away from the frame, so its screws work loose first.
- Tighten every screw in the top hinge, on both the jamb leaf and the door leaf. Use a screwdriver that fills the screw head so you don't strip it. If every screw bites and snugs up, close the door and recheck the gap; that may be all it needed.
- Fix any screw that just spins. A stripped hole needs new wood to grip. Remove the screw, push two or three wooden toothpicks or a golf tee coated in wood glue into the hole, snap them off flush and let the glue set for about an hour before driving the screw back in.
- Swap one jamb screw for a long one. The standard screws in most hinges only reach into the thin door jamb. Behind the jamb, past a gap filled with shims, is a wall stud. Replace one jamb-side screw in the top hinge, usually the one closest to the door stop molding, with a 3 in (75 mm) screw with a head that sits flush in the hinge's countersink. It reaches the stud and pulls the whole top of the jamb, and the door with it, back toward the hinge side.
- Drive it gradually and keep checking. Snug it, close the door and look at the gap on the latch side. Turn it a little more if the top corner still rubs. Overtightening can pull the jamb in so far that the latch side gap grows too wide or the jamb bows, so stop as soon as the gap looks even.
A pack of long hinge screws in common finishes costs a few dollars at a hardware store. If the screw resists badly going through the jamb, drill a pilot hole about 1/8 in (3 mm) wide through the jamb first. The whole job takes 10 to 15 minutes, and it often fixes a latch that wouldn't catch as well, because lifting the sag raises the latch back to the strike.
Swelling in humid months versus a true fit problem
Wood takes on moisture from the air and expands, then shrinks as the air dries out. A door that sticks all summer and swings freely all winter is almost always swelling, not a hinge or frame problem. The giveaway is timing: tight gaps that come and go with the weather, with no sag and no obvious single rub point.
Doors swell most when some of their surfaces were never sealed. Painters often skip the top and bottom edges, which you rarely see. Check them with a hand mirror and a flashlight, or run your fingers along the top edge from a step stool. Bare wood there drinks moisture from the room every humid day.
The fixes for swelling, cheapest first:
- Dry the air. Running air conditioning or a dehumidifier in the room often shrinks the door back within a few days. Bathrooms benefit from running the exhaust fan through and after showers.
- Seal the bare edges once the door has dried out and fits again. A coat of primer and paint, or clear finish on a stained door, on the top and bottom edges slows how fast the wood takes up moisture.
- Hold off on planing in summer. A door planed to fit while swollen will show a wide, drafty gap in winter. If it is so tight you can't use it, take off only enough to stop the rubbing, not enough to make it swing freely.
If the door sticks in the same place year-round, it is a true fit problem: go back to the hinges, then the strike, then consider planing.
Adjusting or filing the strike plate
When a door closes without rubbing but won't stay shut, the latch bolt is missing the hole in the strike plate, the metal plate on the frame. Find out exactly where it lands before changing anything.
The lipstick or chalk trick
Rub lipstick, chalk or a dry-erase marker on the end of the latch bolt. Close the door gently until the latch touches the strike plate, and let it scrape across the plate as it would when latching. Open the door and look at the mark. It shows whether the latch is landing above, below, or short of the opening, and by how much.
Matching the fix to the mark
- Latch lands low, and the door sagged: tighten the top hinge first, as above. That often raises the latch right back into place.
- Latch misses by about 1/8 in (3 mm) or less: enlarge the opening. Unscrew the strike plate, clamp it in a vise or hold it firmly on a scrap board, and file the edge of the opening on the side the mark shows with a flat or half-round metal file. Check that the wood mortise behind the plate is deep enough for the latch; pare it with a chisel if not. Refit and test.
- Latch misses by more than that: move the plate. Fill the old screw holes with glued toothpicks or a dowel, mark the new position from the lipstick line, chisel the recess so the plate sits flush, and screw it in. This takes closer to an hour and leaves a small patch to fill and touch up.
- Latch lands short of the plate: the gap is too wide for the latch to reach. A thin shim of cardboard behind the strike plate can bring it forward; if the door also rattles when closed, look at the next point.
- Door latches but rattles: many strike plates have a small tab on the inside edge of the opening. Bend it slightly toward the door stop with a flat screwdriver so the latch holds the door tighter against the stop.
- Door only latches when pushed hard: the door stop molding may be set too far out, so the door hits the stop before the latch clears the strike. Filing the strike opening toward the stop side usually solves it.
Silencing a squeaky hinge
A squeak comes from metal grinding on metal where the hinge pin turns inside the knuckles, usually because old lubricant has dried out or collected grit. Spraying oil on the outside quiets it briefly, then attracts dust and drips. Cleaning and greasing the pin lasts much longer.
- Close the door so its weight sits on the other hinges and the latch while one pin is out. Work on one hinge at a time.
- Tap the pin out. Hold a nail, nail set or thin screwdriver against the bottom of the pin and tap upward with a hammer until you can pull the pin free from the top.
- Clean it. Rub the pin with fine steel wool or fine sandpaper to remove rust and old residue, then wipe it clean. Wipe out the hinge knuckles with a rag or pipe cleaner.
- Grease it lightly. Coat the pin with a thin film of white lithium grease or petroleum jelly. More is not better; excess squeezes out and stains the door.
- Reinsert and test. Push the pin back in, tap it home, swing the door a few times, and wipe off anything that oozes out.
Some hinges, especially on doors where security matters, have pins that are not meant to come out. On those, work a light grease into the top and bottom of the knuckles while swinging the door back and forth.
Planing or sanding an edge as a last resort, and sealing it
Plane only when the hinges are tight, the strike is right, the season isn't causing the problem, and the door still rubs in one place. Removing wood can't be undone, so take off the least you can.
Check the paint first
Sanding or planing a painted door makes fine dust. According to the EPA's guidance on reducing lead exposure at home, a home built before 1978 is more likely to have lead-based paint, and dust and chips from that paint are one of the most common sources of lead exposure in homes. If your house is that old, test the paint before you cut into it, or have someone trained in lead-safe work do the job.
How to take off the right amount
- Mark the tight spot. With the door closed, run a pencil along the frame against the door face where it rubs, or hold a pencil flat on the jamb and draw a line along the door edge at the depth of the coin-thickness gap you want.
- Decide whether to remove the door. A rub along the top can often be sanded or planed with the door hanging. The latch edge and the bottom need the door off. To remove it, close it, tap out the bottom hinge pin, then the top, with someone holding the door, and lay it across padded sawhorses.
- Choose the tool. For a sliver of wood, a sanding block with 80-grit paper is enough. For more, use a block plane or, for a long edge, a hand or power planer. Plane with the grain, and when working across the top or bottom, plane from each end toward the middle so the end grain doesn't splinter off the corners.
- Keep the latch edge bevel. The latch edge of most doors is cut at a slight angle so it clears the jamb as it swings. Follow that angle rather than squaring it off.
- Test often. Take a few passes, rehang or close the door, and check. Stop the moment it closes without rubbing, and leave a touch of extra room for the paint you are about to add.
Go easy on hollow-core doors. They have only a narrow strip of solid wood inside their edges, and planing through it leaves a hollow edge that won't hold paint or screws well.
Seal the bare wood
A freshly planed edge is raw wood, and it will swell again faster than the rest of the door. Prime and paint it, or apply the same clear finish the door already has, including the top and bottom edges while the door is off. Let the finish dry fully before rehanging so it doesn't stick to the frame. Sealed edges are what keep the door fitting after the next humid stretch, so this step matters as much as the planing itself.