Recaulking a Bathtub Without Gaps, Smears or Peeling
Most new tub caulk fails because old residue was left behind, the wrong caulk was used, or the joint opened once the tub filled. Here is how to strip, prep and lay a bead that lasts.
Drafted with AI. This version has not been reviewed by an editor, so it carries no ads — how we work.
A new caulk line around a tub usually fails for one of three reasons: bits of the old caulk were left behind, the caulk was the wrong type for a wet joint that moves, or the bead went on while the gap was at its narrowest and tore the first time someone filled the tub. Deal with those three things and a first-timer can lay a bead that stays sealed and clean-looking for years. This walkthrough is for a homeowner, or a tenant with the landlord's go-ahead, whose tub or shower caulk has cracked, pulled away or turned dark, and who has never done the job before. Plan on an afternoon of work, plus a day before the tub goes back into normal use.
Check the wall before you buy anything
Caulk seals a sound joint; it cannot hold a failing wall together. Press firmly on the tile or surround panels just above the tub, especially in the corners and near the faucet. If the wall feels soft or spongy, a tile moves or sounds hollow, grout is crumbling out in chunks, or you can see staining, swelling or rot once the old caulk comes out, stop. Those signs point to water damage behind the tub, and that needs repair first, often by a contractor. New caulk over a wet, moving substrate will peel within weeks and can hide the damage while it spreads.
If the wall is firm and the only problem is the caulk itself, carry on.
Tools and the right caulk
If you own nothing, expect to spend roughly $25 to $50 in total. You will need:
- A tube of tub-and-tile caulk labeled for kitchens and baths and mildew-resistant. One standard 10-ounce cartridge covers a typical tub with plenty to spare.
- A caulk gun. A dripless model, which releases pressure when you let go of the trigger, makes a cleaner finish for beginners. Squeeze-tube caulk works too but is harder to control.
- Removal tools: a utility knife, a razor scraper with plastic blades (metal blades scratch acrylic and fiberglass tubs), and a plastic caulk-removal tool or old putty knife.
- Caulk remover or softener, a gel that loosens old caulk and helps lift silicone film. Check the label says it is safe for your tub material.
- Isopropyl alcohol (rubbing alcohol), lint-free rags or paper towels, and a nonabrasive scrub pad.
- Painter's tape, about 1 inch wide.
- Disposable nitrile gloves, a small cup of water with a few drops of dish soap, and a stiff wire or long nail to pierce the cartridge seal.
Silicone versus siliconized acrylic
The two caulks sold for tubs behave very differently, and picking the wrong one is the second common cause of failure.
| Feature | 100% silicone | Siliconized acrylic (acrylic latex with silicone) |
|---|---|---|
| Flexibility in a moving joint | Stays rubbery and stretches with the tub | Firmer once cured; more prone to cracking where the tub flexes |
| Water resistance | Excellent | Good, but generally a shorter service life in constant wet |
| Ease of tooling and cleanup | Sticky and slippery; cleans up with alcohol or mineral spirits, not water | Forgiving; smooths and cleans up with water while wet |
| Paintable | No | Yes |
| Sticks to old silicone residue | No | No |
For the joint where a tub meets tile or a surround, we'd choose 100% silicone. That joint moves every time the tub fills, drains or takes someone's weight, and silicone tolerates that movement best. Siliconized acrylic makes sense when you need to paint the caulk to match, or when you are nervous about the mess and want water cleanup, but accept that it will probably need redoing sooner. Whichever you choose, read the label for the maximum joint width it handles. If the gap is wider than that, roughly a quarter inch or more, push a strip of foam backer rod into it first so the caulk does not sink and thin out.
Removing every trace of the old bead
This is the slowest step and the one that decides whether the new caulk lasts. New silicone will not bond to old silicone, not even a thin, invisible film of it. Caulk laid over residue looks fine for a few weeks, then lifts at the edges.
- Slice both edges. Run the utility knife along the top edge of the bead (against the tile) and the bottom edge (against the tub), holding the blade nearly flat so you cut caulk, not surface.
- Pull out the strip. Grip a loose end and peel it away slowly. Silicone often comes out in long strips; acrylic tends to crumble and needs scraping.
- Soften what remains. Spread caulk remover over stubborn patches and leave it for the time the label states, which may be a few hours.
- Scrape. Work the plastic razor blade and removal tool along both surfaces and into the gap itself. Dig out old caulk from inside the joint, not just the face.
- Check by touch and with water. Run a fingertip along the cleaned surfaces. Residue feels slick or rubbery compared with bare glaze. Splash a little water on: it tends to bead up on silicone film and sheet out on clean tile and tub. Scrub any slick areas with the nonabrasive pad and a little more remover.
If the old caulk was black with mildew, look at the joint underneath. Surface spotting on the tile or tub can be cleaned with a bathroom mildew remover or a bleach-based cleaner used as its label directs. Never mix bleach with ammonia, vinegar or other cleaners, and keep the room ventilated.
Cleaning and drying the joint
Once the old caulk is gone, wipe both surfaces and the gap with isopropyl alcohol on a clean rag. Alcohol removes soap scum, body oils and leftover remover, all of which stop caulk sticking. Change to a fresh section of rag often so you are lifting dirt, not spreading it.
Then let the joint dry completely. The alcohol on the surface flashes off in minutes, but water from the scraping and cleaning can sit inside the gap for much longer. Leaving it overnight with the bathroom fan running or a window open is the safe approach. If you cannot wait that long, give it at least a few hours and run a hair dryer on a low setting along the gap. Do not shower or run the tub in the meantime.
Filling the tub so the gap is at its widest
Fill the tub with water before you caulk, as full as it will go without reaching the overflow. Water weighs about 8.3 pounds per gallon, so a tub holding 40 gallons carries roughly 330 pounds (40 × 8.3 = 332). That load pushes the tub down slightly and opens the joint to about its widest. Caulk laid in that position only has to compress when the tub is empty, which it handles well. Caulk laid with the tub empty gets stretched every time someone bathes, and that is how a fresh bead pulls loose in the first week.
Acrylic and fiberglass tubs flex the most, so this step matters most for them; cast iron and steel tubs move less but still benefit. Leave the water in until the caulk has cured, and keep the outside of the tub dry while you work.
Taping, cutting the nozzle and running the bead
Tape a guide
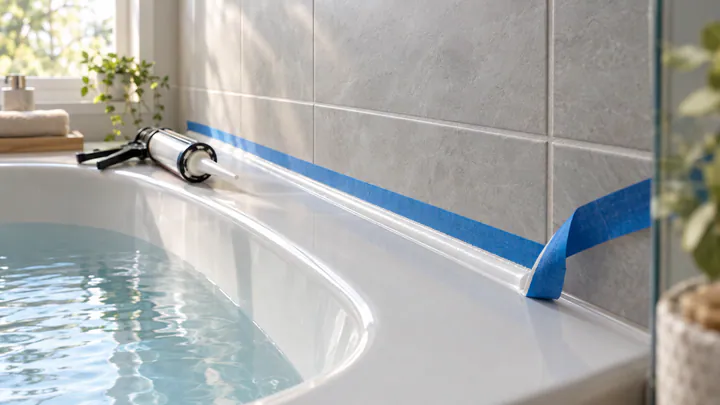
Put a strip of painter's tape on the tile about 1/8 inch above the joint and another on the tub about 1/8 inch below it, so the exposed band is the width you want the finished bead to be. Press the tape edges down firmly with a fingernail. Tape turns a wobbly first attempt into a straight line and keeps smears off the tile.
Cut the nozzle small
Cut the nozzle tip at a 45-degree angle with a utility knife, close to the end so the opening is small, about 1/8 inch. You can always trim more off if the bead is too thin; you cannot make a big hole smaller. Push the wire down the nozzle to break the foil seal inside the cartridge, then load it into the gun.
Run the bead
- Practice a few inches on a piece of cardboard to feel how much trigger pressure gives a steady flow.
- Start at one end of the long back wall, hold the gun at roughly 45 degrees to the joint, and squeeze gently until caulk reaches the surfaces.
- Move in one smooth, continuous pass at an even speed, keeping steady pressure on the trigger. Aim to fill the gap, not pile caulk on top of it.
- Stop at the corner, release the trigger, and pull the gun away. On a non-dripless gun, press the release tab so caulk stops oozing.
- Do the short end walls the same way, overlapping slightly into the corner.
Work one wall at a time from bead to tooling, because silicone starts to skin over within minutes.
Tooling, pulling tape and curing
Tooling presses the caulk into the joint and gives it a smooth, slightly concave face. Put on a nitrile glove, dip a fingertip in the soapy water, and draw it along the bead in one steady pass with light pressure. The soap stops silicone sticking to your glove. Wipe excess off your finger onto a paper towel as it builds up. With siliconized acrylic, a damp fingertip or damp sponge works. Resist going back over it repeatedly; each extra pass drags the surface.
Pull the painter's tape straight away, while the caulk is still wet. Peel it slowly, at a low angle, away from the bead. If you wait until the caulk skins over, the tape tears the edge and leaves a ragged line. If the edge ridges up slightly after the tape comes off, a very light pass with a soapy fingertip settles it.
Then leave it alone. Cure times vary widely by product, from as little as 30 minutes for some fast-cure formulas to 24 hours or more for others, and acrylic caulks often need longer before they can take water. Follow the cure time on your product's label before draining the tub or showering, and keep the bathroom ventilated while it cures. Fresh silicone often smells of vinegar; that fades as it cures.
Why caulk peels or darkens again, and how to prevent it
When a new line fails, the cause is usually traceable:
- Peeling at the edges nearly always means the surface was not clean or dry: silicone residue, soap film or moisture in the joint. The fix is to remove the bead entirely and repeat the cleaning, alcohol wipe and drying steps. Patching over a peeling section does not hold.
- A split down the middle or along one side usually means the joint moved more than the caulk could handle: it was laid with the tub empty, the bead was too thin, or a less flexible acrylic was used where silicone was needed.
- Dark spots or a gray cast are typically mildew growing on or into the caulk. Surface spots may clean off, but once mildew is inside the bead, cleaning will not reach it and the caulk needs replacing.
- Gaps behind the caulk that you can see or probe with a fingernail suggest the wall or tub is moving or deteriorating. Recheck the wall as described at the top before caulking again.
A few habits stretch the life of a good bead. Run the exhaust fan during showers and for a while afterward, or crack a window, so the room dries quickly. Squeegee or wipe the tub joint after showering so water does not sit on the caulk. Clean it with a mild bathroom cleaner and a soft cloth rather than abrasive powders or scouring pads, which roughen the surface and give mildew a foothold. And look along the line every few months: catching a small lifted corner early lets you recaulk before water gets behind the tub.