Scrapbooking Wall Art: Ideas, Supplies, and Setup
Scrapbooking wall art turns photos, ticket stubs, and keepsakes into framed decor you actually live with. Here is what to buy, which frame depth to pick, how high to hang it, what it costs, and the archival mistakes that quietly ruin memories.
Rewritten with AI and republished automatically. Our editors set the standards and fix reported errors — how we work.
TL;DR: Scrapbooking wall art turns photos and keepsakes into framed decor. Scan originals and print copies, keep each piece to two or three colors, use a shadow box for anything thicker than a quarter, hang with the center at 57–60 inches, and skip humid rooms. Budget roughly $25–$60 per framed piece.
What is scrapbooking wall art, exactly?
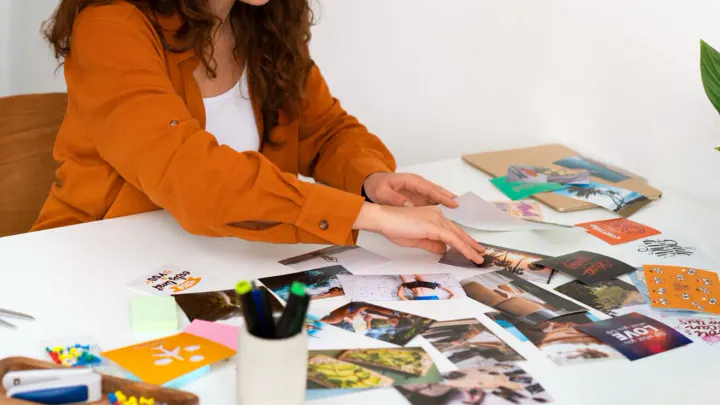
Scrapbooking wall art is a framed or mounted memory collage built from photographs, patterned paper, handwriting, and small keepsakes that is designed to hang on a wall rather than live in an album. It uses the same techniques as album scrapbooking — layering, matting, journaling, embellishment — but the finished layout is treated as a piece of decor with a fixed size and a frame.
The practical difference is editing. An album page can hold twelve photos because nobody stands six feet away from it. A wall piece has to read clearly from across the room, which usually means one hero image, two or three supporting elements, and a short caption. That constraint is why people who find albums overwhelming often finish a wall piece in a single evening.
What supplies do I actually need to start?
You need five things: acid-free paper or mat board, photo-safe adhesive, sharp scissors or a craft knife, a pigment pen for captions, and a frame. Everything else is optional. The most common beginner mistake is buying a $70 haul of embellishments before making a single layout.
- Acid-free, lignin-free cardstock or mat board — this is the backing your memories sit on, so it is the one place not to economize.
- Photo corners or archival adhesive runner — corners are reversible, which matters more than people expect when you change your mind about placement.
- Pigment ink pen (not a ballpoint or gel pen) for dates and captions, because pigment ink resists fading far better than dye-based ink.
- A metal ruler and craft knife for clean straight cuts; decorative edge scissors are fun but rarely make a piece look better.
- A frame with glazing — ideally UV-filtering acrylic or glass if the wall gets any daylight.
Skip for now: die-cut machines, specialty punches, chipboard alphabets, and anything sold as a "complete kit" in a theme you did not choose yourself. Buy those after your third piece, when you know what you actually reach for.
Which display format should I choose: flat frame, shadow box, or ledge?
Pick by thickness first, not by looks. If every element lies flat — prints, paper, tickets, handwriting — a standard frame works. If anything is thicker than about 1/16 inch, roughly the thickness of a quarter, the glass will press on it and you need a shadow box. Trying to force a bulky item under flat glazing bows the frame, creases photos, and eventually cracks the glass.
| Format | Usable depth | Best for | Typical cost (8x10–11x14) | Difficulty |
|---|---|---|---|---|
| Flat frame with mat | Under 1/8 in. | Photos, paper, tickets, captions | $15–$35 | Easy |
| Float frame (glass both sides) | Under 1/8 in. | Single layered collage, torn-edge paper | $25–$45 | Easy |
| Shadow box | 1–2 in. | Booties, medals, fabric, dried flowers, keys | $25–$60 | Moderate |
| Picture ledge or rail | Unlimited | Rotating seasonal pieces, unframed boards | $20–$40 per ledge | Easy |
| Wire grid or clip line | Unlimited | Casual, changeable photo walls | $15–$30 | Very easy |
Our decision rule: if you expect to change the contents more than once a year, choose a ledge or a frame with a tool-free back. Sealed shadow boxes are wonderful for permanent tributes and genuinely annoying for anything seasonal.
What are the best scrapbooking wall art ideas to try first?
Start with a theme that already has a natural boundary — one trip, one year, one person. Open-ended themes such as "family" stall because there is no obvious stopping point. These five work reliably.
1. Travel map collage
Mount a regional map as the background, then layer three or four prints, a boarding pass, and a hand-lettered caption like "Lisbon, October." Thread and pins look great but need a shadow box to avoid crushing. Print maps at home on matte paper rather than cutting an atlas you may want later.
2. Relationship or anniversary timeline
Run a horizontal line across the mat with four to six dated moments above and below it. Restraint is what makes this one work: six photos read as a story, sixteen read as clutter. Dried flowers belong in a shadow box, fully dried and ideally sealed, or they will shed and spot the mat.
3. First-year shadow box
Hospital bracelet, a knitted bootie, the birth announcement, and one photo. Sew fabric items to the backing with a few stitches rather than gluing them — glue stains fabric permanently and cannot be undone when the bootie turns out to be the one thing someone wants back.
4. Graduation or milestone tribute
Tassel, program cover, a printed note from a teacher, and a single strong portrait. Pull two colors from the school palette and stop there. Tassels are thick; this is a shadow box project.
5. Rotating seasonal piece
Build four interchangeable inserts sized to one frame — autumn, winter holidays, spring, summer — and swap them from an envelope stored behind the backing board. This is the highest-value idea on the list because one frame does four jobs, and it pairs naturally with a refreshed entryway design that earns its first three feet.
How do I keep photos and keepsakes from fading or yellowing?
Three rules cover most of it: never mount irreplaceable originals, keep the piece out of direct sun, and use only photo-safe adhesives. Wall display is the most demanding environment in the house for paper — more light, more temperature swing, more dust than any album ever sees.
- Scan first, then print copies. A 600 dpi scan of a print gives you a working file and an insurance policy. Store originals flat, in the dark, in a stable room.
- Avoid direct sunlight entirely. Inkjet and dye-sublimation prints fade under UV, and no glazing stops it completely. UV-filtering acrylic slows the process; a north-facing wall or an interior hallway is better protection than any product.
- Ban the wrong adhesives. Rubber cement, cellophane tape, hot glue on photo surfaces, and vintage magnetic album pages all stain or bond irreversibly.
- Choose plastics carefully. If you sleeve anything, use polypropylene or polyester rather than PVC, which can off-gas and damage prints over the years.
- Watch humidity. Archival guidance generally warns against hanging paper keepsakes in bathrooms, kitchens, or on exterior walls prone to condensation. Sealed shadow boxes in damp rooms can develop mold on fabric and pressed flowers where you cannot see it.
This does not apply if the item is genuinely irreplaceable — a single surviving photograph, a military decoration, a handwritten letter. Those belong in archival storage with a high-quality reproduction on the wall. No decor project is worth the only copy.
How high should I hang it, and how do I space a gallery wall?
Hang so the center of the artwork sits 57 to 60 inches from the floor, the standard used in galleries, and leave 2 to 3 inches between frames in a group. Above a sofa or console, leave about 6 to 8 inches between the furniture and the bottom of the frame so the arrangement reads as one visual block.
- Trace each frame on kraft paper or newspaper, cut out the templates, and tape them to the wall first. Live with the layout for a day.
- Mark the hanger position on each template, not the frame center — the hanging hardware usually sits 2 to 4 inches below the top edge.
- Drive the fastener through the paper, then tear the template away.
- For adhesive strips, check the package weight rating and subtract the glass: a mid-size framed piece with glazing is heavier than most people estimate. Shadow boxes over a few pounds deserve a wall anchor or a stud.
Worked example. An 11x14 travel collage: $18 frame, $6 for six 4x6 matte prints, $5 cardstock and mat scraps, $7 adhesive runner, $4 pigment pen. About $40 and roughly 90 minutes, most of it spent choosing which six photos to cut from twenty.
Memory collage decor or traditional scrapbooking — which should I do?
Choose collage decor when you want a finished object on a wall within an evening, and traditional albums when the writing matters more than the display. The two are complementary: many people build an album for depth and pull one standout spread onto the wall as a framed piece.
- Collage decor suits: a small number of strong images, short captions, seasonal rotation, and gifts.
- Albums suit: long-form journaling, fragile ephemera, chronological projects, and anything you want protected from light.
Whichever you choose, the bottleneck is almost always the photo library, not the craft supplies. Sorting a decade of camera roll before you start saves hours later — our digital declutter guide has a workable system for getting files into named folders you can actually search.
What mistakes cost people the most?
The expensive errors are archival, not aesthetic. A crooked frame is a five-minute fix; a photo glued face-down with rubber cement is gone.
- Gluing originals. The single most common and least reversible mistake.
- Overfilling. More than about seven visual elements in one frame and the eye stops reading anything.
- Using every color in the drawer. Limit each piece to two or three colors drawn from the photos themselves.
- Trimming to fit after framing. Build to the mat opening from the start; cutting a finished layout down almost always clips a face or a caption.
- Hanging it where the sun hits at 3 p.m. Check the wall at several times of day before you commit to a nail hole.
Does making it actually help how you feel?
Many people find focused craft work calming and find that revisiting meaningful photographs lifts mood, and research on absorbing hands-on activities generally points in that direction. We would not overstate it: this is a pleasant, grounding hobby, not a treatment.
Memory projects can also surface difficult feelings, particularly work involving grief or loss. If a project consistently leaves you distressed, set it aside and consult a qualified mental health professional rather than pushing through. Working alongside a partner, a child, or a friend tends to make the process lighter, and it produces captions nobody would have written alone. If you want the habit to stick, attach it to an existing rhythm — the approach we describe in our piece on building a morning routine that works applies just as well to an evening craft hour.
Where should I buy supplies?
General craft chains carry the basics; the archival-specific items are easier to find from framing and preservation suppliers. Look for the words acid-free, lignin-free, and photo-safe on the packaging, and for photographic storage in particular, unbuffered materials are often the safer choice for color prints.
- Craft retailers for paper, adhesive, pens, and standard frames.
- Framing suppliers for mat board cut to size, UV-filtering glazing, and deeper shadow boxes.
- Handmade marketplaces for custom shadow boxes and unusual embellishments.
- Local print shops for matte prints, which show less glare behind glass than glossy.
- Design tools and image boards for layout inspiration before you cut anything.
Key takeaways
- Scan and print copies; never glue an irreplaceable original into a wall piece.
- Anything thicker than a quarter needs a shadow box, not a flat frame.
- Hang with the center at 57–60 inches and leave 2–3 inches between frames.
- Limit each layout to two or three colors and about seven visual elements.
- Avoid sun-facing walls, bathrooms, and kitchens — light and humidity do the damage you cannot undo.
- Budget roughly $25–$60 per framed piece and buy embellishments only after your third project.
Frequently asked questions
What is scrapbooking wall art?
Scrapbooking wall art is a framed or mounted memory collage made from photos, paper, and small keepsakes that is designed to hang on a wall rather than sit in an album. It borrows scrapbooking techniques such as layering, journaling, and embellishment, but treats the finished layout as decor.
Should I use original photos or copies?
Use copies. Scan or photograph originals first, then print duplicates for the piece and store the originals flat, away from light and humidity. Adhesive, UV exposure, and later re-framing all put originals at risk, and a wall is the harshest place in the house for paper.
What frame depth do I need for keepsakes?
If any item is thicker than about 1/16 inch — roughly the thickness of a quarter — you need a shadow box rather than a flat frame. Most standard shadow boxes offer 1 to 2 inches of interior depth, which handles ticket stubs, fabric, dried flowers, small medals, and baby booties.
How high should I hang scrapbooking wall art?
Hang so the center of the piece sits about 57 to 60 inches from the floor, which is standard gallery eye level. Above a sofa or console, leave roughly 6 to 8 inches between the furniture top and the bottom of the frame so the two read as one group.
Which adhesives are safe for photos and keepsakes?
Photo corners, archival photo-safe mounting tape, and acid-free adhesive runners are the safest choices. Avoid rubber cement, ordinary cellophane tape, hot glue on photo surfaces, and old magnetic or self-adhesive album pages, all of which yellow, stain, or bond permanently over time.
Can I hang scrapbooking wall art in a bathroom or kitchen?
We do not recommend it. Steam, cooking grease, and swinging humidity cause paper to cockle, adhesives to release, and pressed flowers or fabric to grow mold inside a sealed shadow box. Hallways, bedrooms, stairwells, and home offices are far better locations.
How much does a scrapbooking wall art project cost?
A single framed 8x10 or 11x14 collage typically runs about $25 to $60 including the frame, prints, paper, and adhesive. A three- to five-piece gallery wall usually lands between $90 and $250 depending on whether you use shadow boxes and UV-filtering glazing.
What is the difference between memory collage decor and traditional scrapbooking?
Memory collage decor is edited, framed, and displayed; traditional scrapbooking is layered, journaled, and stored in albums. Collage decor favors a handful of strong images and short captions, while album scrapbooking can hold dozens of pages and long-form writing. Most people end up doing both.